I love getting creative with my holiday décor.
I’m one of those unicorns that switches up my Christmas accent colors every year.
That means, I have enough ribbon to circle the earth twice. Just kidding (but barely). I do have a lot of ribbon.
Changing my Christmas colors each year allows me to stretch my neutral decor pretty far.
I have lots of white ornaments and decor in my stash and they can fill pretty much every corner of my house.
But if I had to buy all new ornaments and décor every year to satisfy my colorful whims, I’d be broke by January 1st, you know?
Now, I don’t diy every piece of holiday décor, but I’d say 50% of my Christmas stuff has a do-it-yourself spin on it.
It’s easy and fun to create special pieces during the holidays.
Homemade ornaments make wonderful and artistic gifts.
I can also tell you they make the anxiety inducing and mind numbing activity of watching election results almost enjoyable. (I highly encourage you to fire up a glue gun during times of turmoil. Very therapeutic!)
I digress, yet again.
This is the perfect time of the year to start stocking your totes and bins because all of the Christmas stuff is out in all its glitter covered glory.
These 5 do-it-yourself ornaments will cost you in the neighborhood of $10 to $20 if you buy everything to make them but, you’ll be able to create multiples of each. Bonus!
That said, spending in the neighborhood of 20 bucks at the Dollar Store will get you a TON of stuff you can use this year and well into the coming years.
It’s so true. I have ribbons, silk flowers, baubles, bits and bobs, you name it from well over 10 years and I do a deep dive into my entire stash every year to absorb inspiration.
This year, why not employ a little diy so you don’t have to drain your bank account to get the look you want?
Let’s get into 5 Easy and Gorgeous DIY Christmas Ornaments Anyone Can Make!
Winter Scene Ornament

So for the first ornament you’ll need:
3 dowels or a small piece of wood or plastic to prop your scene.
1 package of Cobblestone Corners Christmas Village Collection figurines.
Hot glue gun and glue sticks
Scissors
Ribbon
First you’ll want to trace the top of your ornament jar on the foam sheet and cut the circle out.
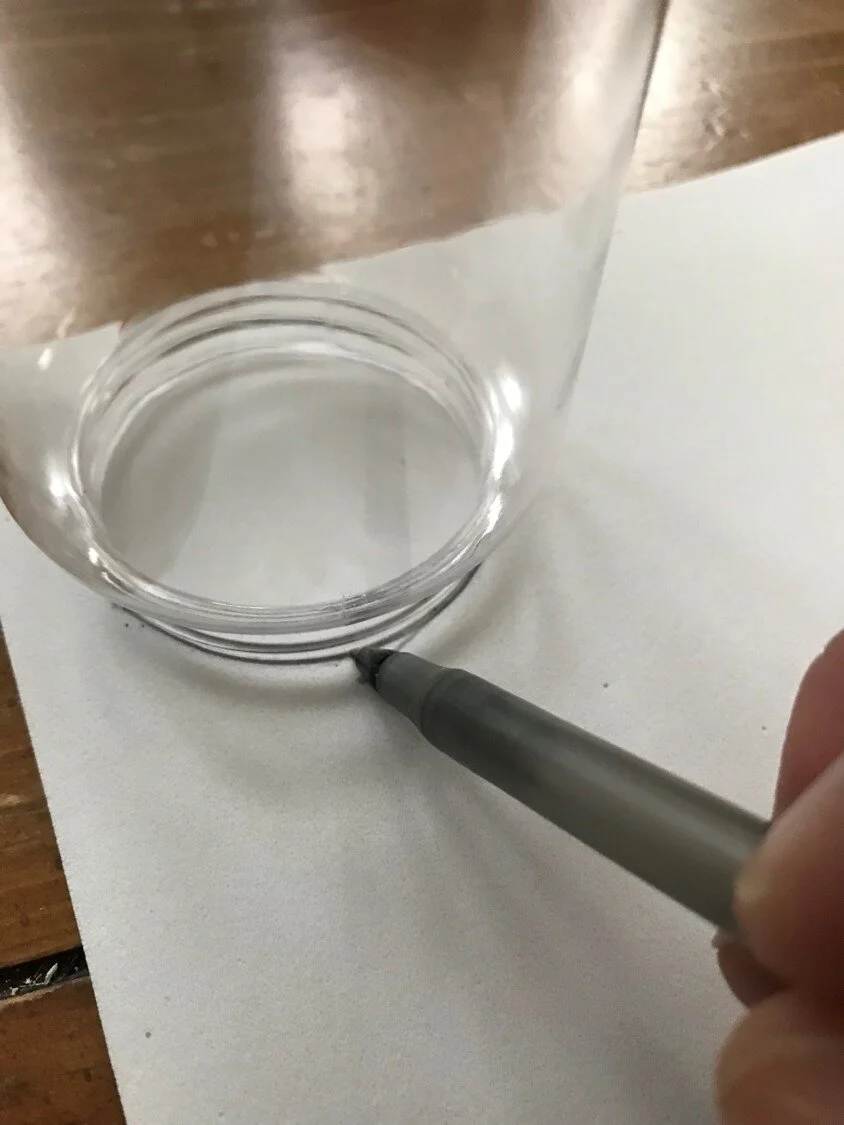
Glue it in the top of the ornament jar lid.

You’ll need a small piece of something to prop the scene up so that it’s level with the top of the jar lid. I had these small dowels in my craft supplies so I used them.

It doesn’t matter what you use because they’ll be covered with a piece of the foam sheet.

Source: Dollar Tree
Glue the foam sheet around your prop piece and set it aside.

Next, Cut and trim your bottle brush tree so that it fits inside the jar.

It helps to trim the back to the tree’s bristles if it’s close to the back of the jar so everything fits..
Glue your support prop into the top of the jar lid making sure to leave enough room to screw the jar back onto the lid.
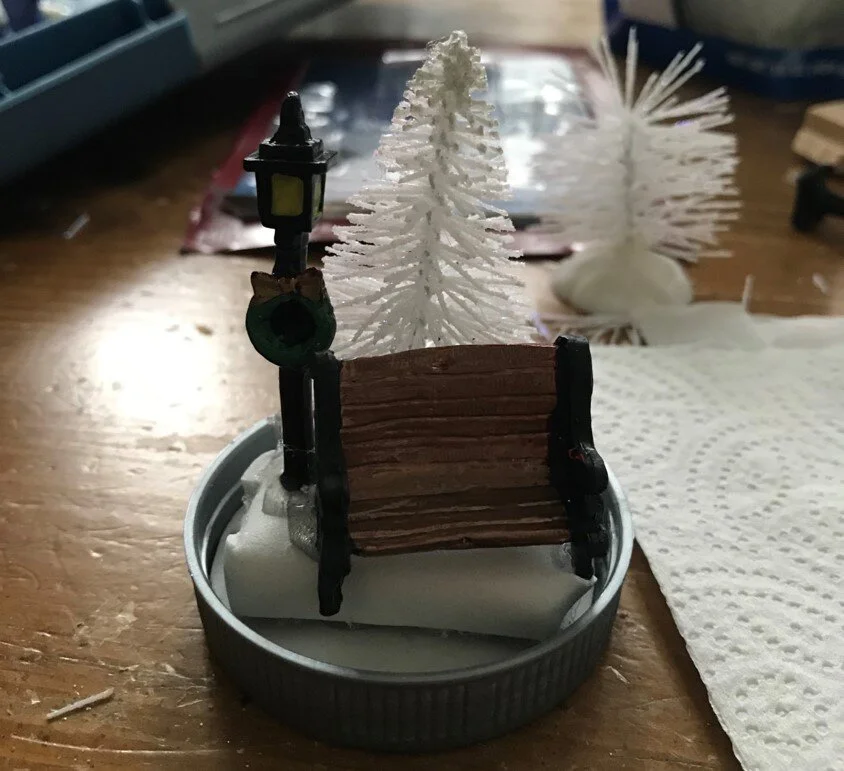
Then glue your tree and figurines into position as you see fit.
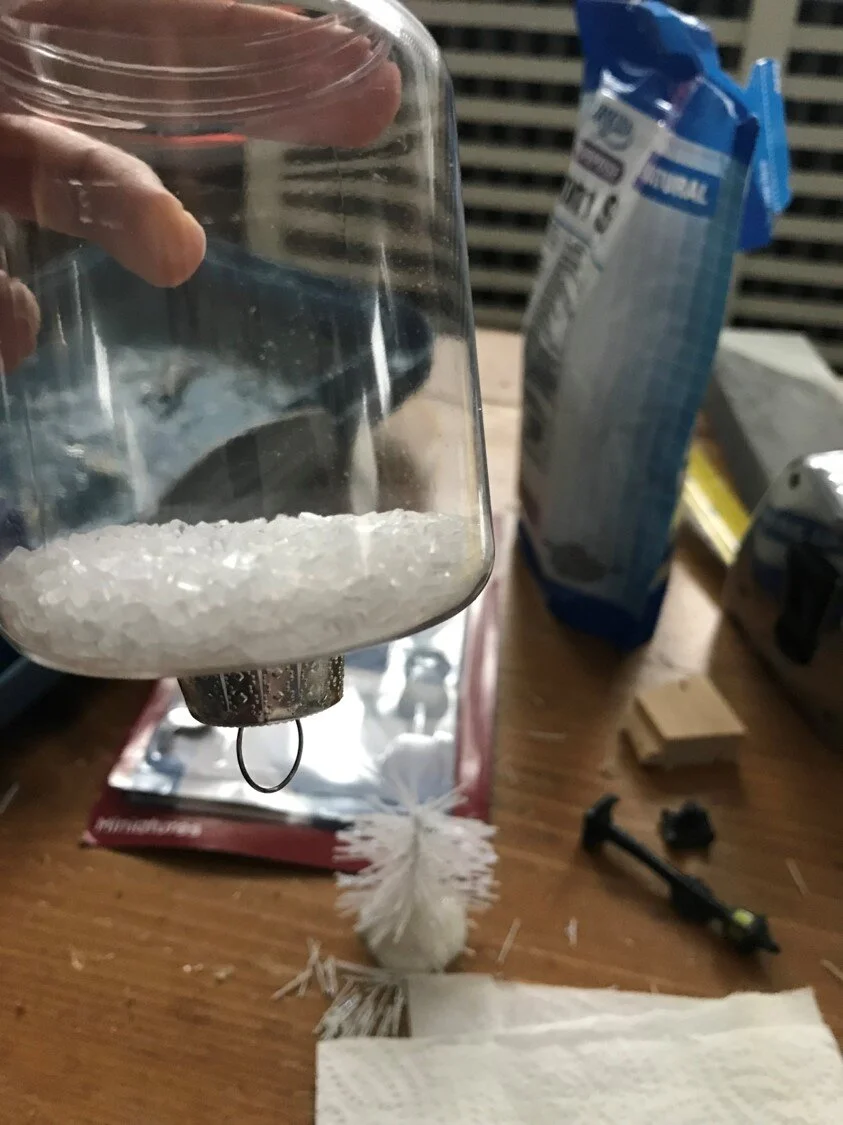
Next, pour a small amount of the Epson salt in the jar.
A little goes a long way and you can adjust as needed.
You don’t want to cover the entire display so remove some until it covers the prop underneath your scene.
Last, Screw the lid onto the jar and embellish the lid with a decorative ribbon at the bottom.
Don’t forget a string or ribbon at the top to hang it.

2. Glam Beaded Snowball Ornament
I found these beautiful pink beaded ornaments as I was scrolling for inspo a few weeks ago.

Sadly, I don’t remember where I found them but I love the way they look.
They aren’t my color palate for this year, but they can be easily recreated in any color you desire!
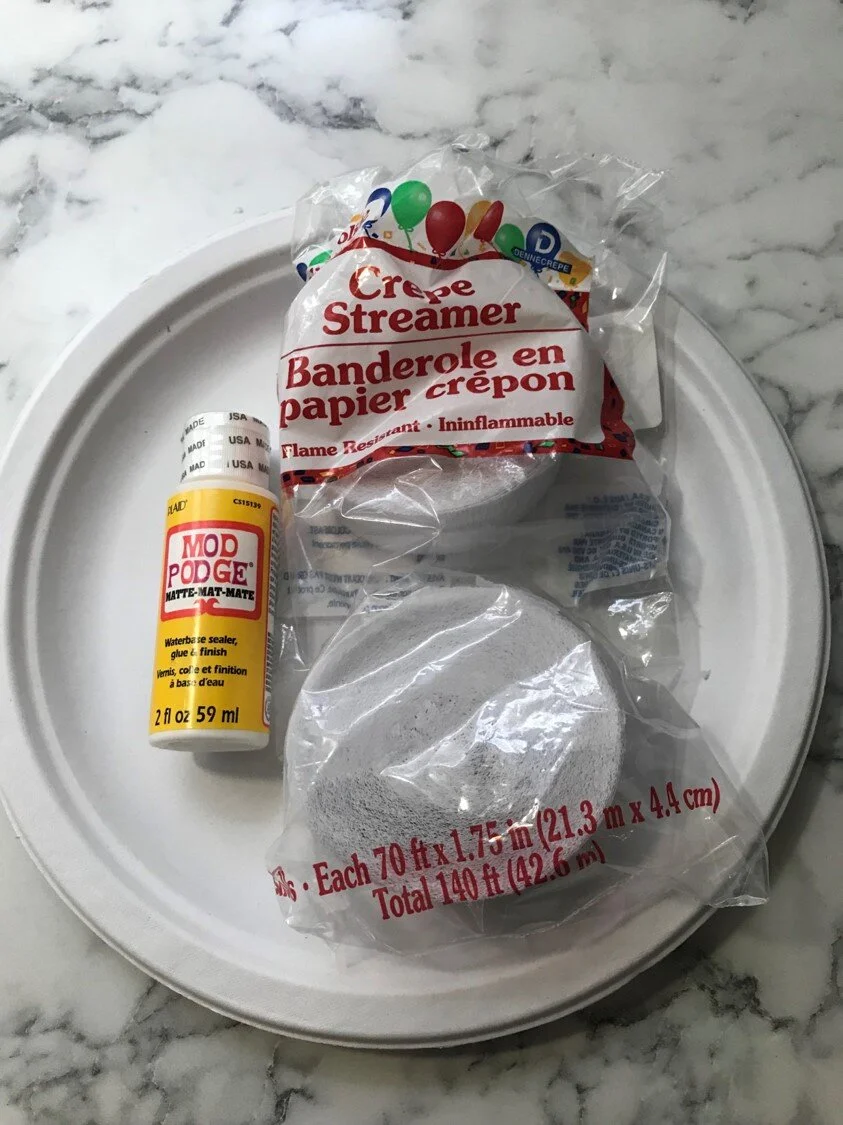
For this ornament you’ll need:
Mod Podge (I chose the mat finish).
A paper plate for holding the Mod Podge glue.
A ribbon to match your ornament color.
1 package of Small, medium and large beads (Dollar Tree in the craft isle).
Spary glitter, optional.
1 small paint brush
Hot glue gun and clear glue sticks.
I made 3 of these ornaments, but the Dollar Tree sells these 4 inch clear plastic ornaments by the piece.
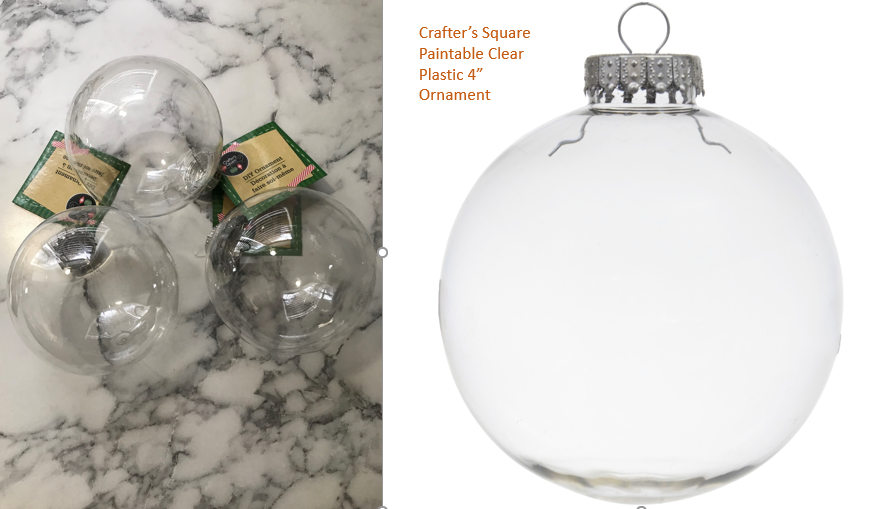
Source: Dollar Tree
Pop the top of the ornament off and put it aside.

Cut 1” squares of the crape paper streamers.
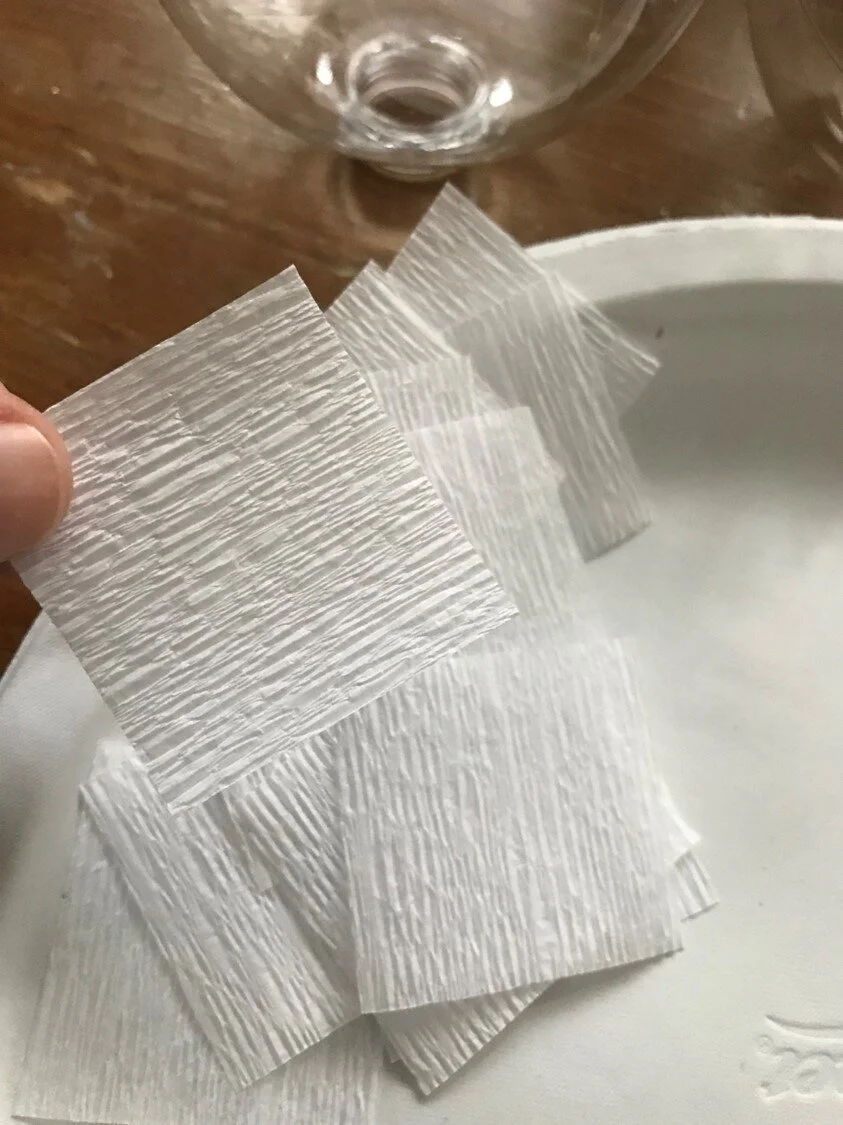
You don’t have to be exact but 1” works well for the application.
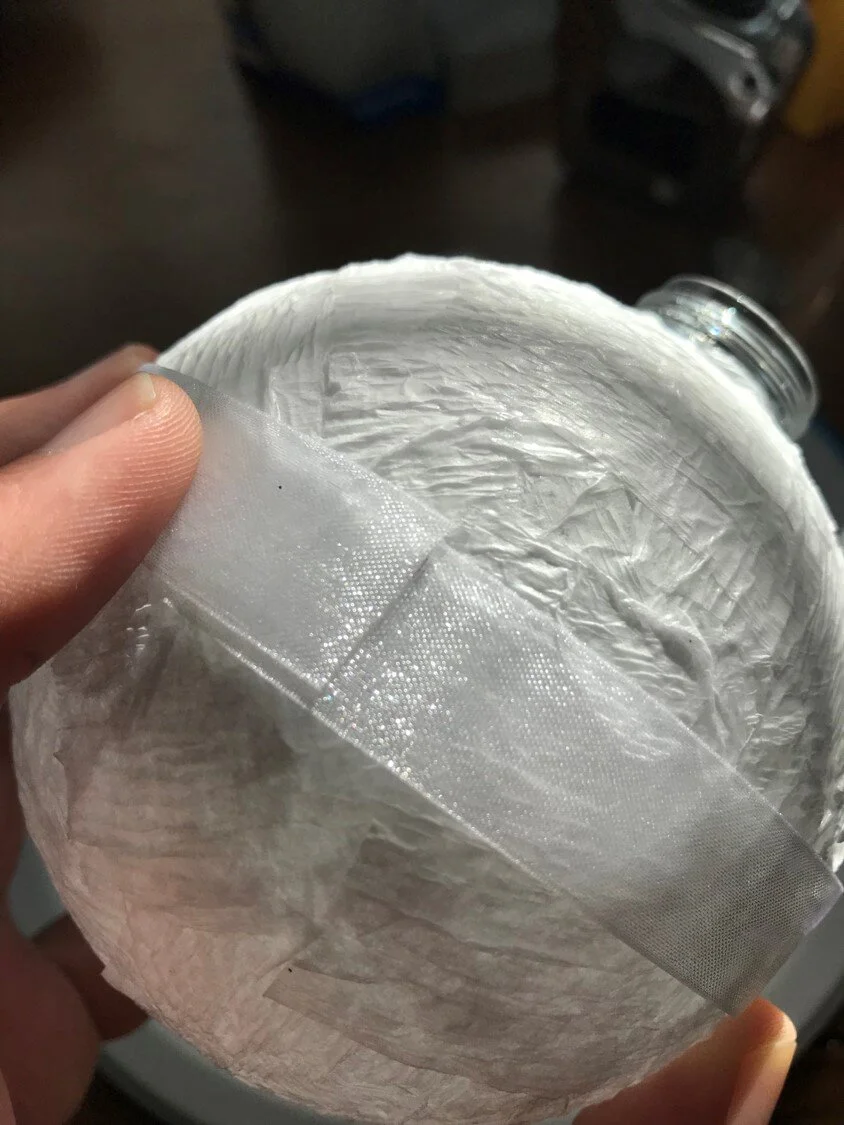
Spread some Mod Podge on the top of the ornament with your paint brush and layer on a piece of the crape streamer on top.

Cover the top of the streamer with another layer of Mod Podge and continue around the entire ornament: Mod Podge, crape streamer, Mod Podge until covered.
If you’ve ever made a paper mache anything, this is the same process.
Cover the ornament with two layers of the crape paper streamer squares, letting them dry in between layers.
Place the ornaments up-side-down so that the opening at the top is supporting it while it dries.
I waited about 2 hours in between layers to make sure the first layer was dry.
Then, after the second layer is dry, glue a ribbon around the middle of the ornament.
This acts as a guide for where you’ll put the beads.
I hot glued the ribbon on, securing it at the ends and with a few dots of glue around the perimeter.
This is to ensure that your ribbon won’t move while your gluing the beads.
Next, start hot gluing the large beads and place them around the perimeter of the ornament using the ribbon as your border guide.
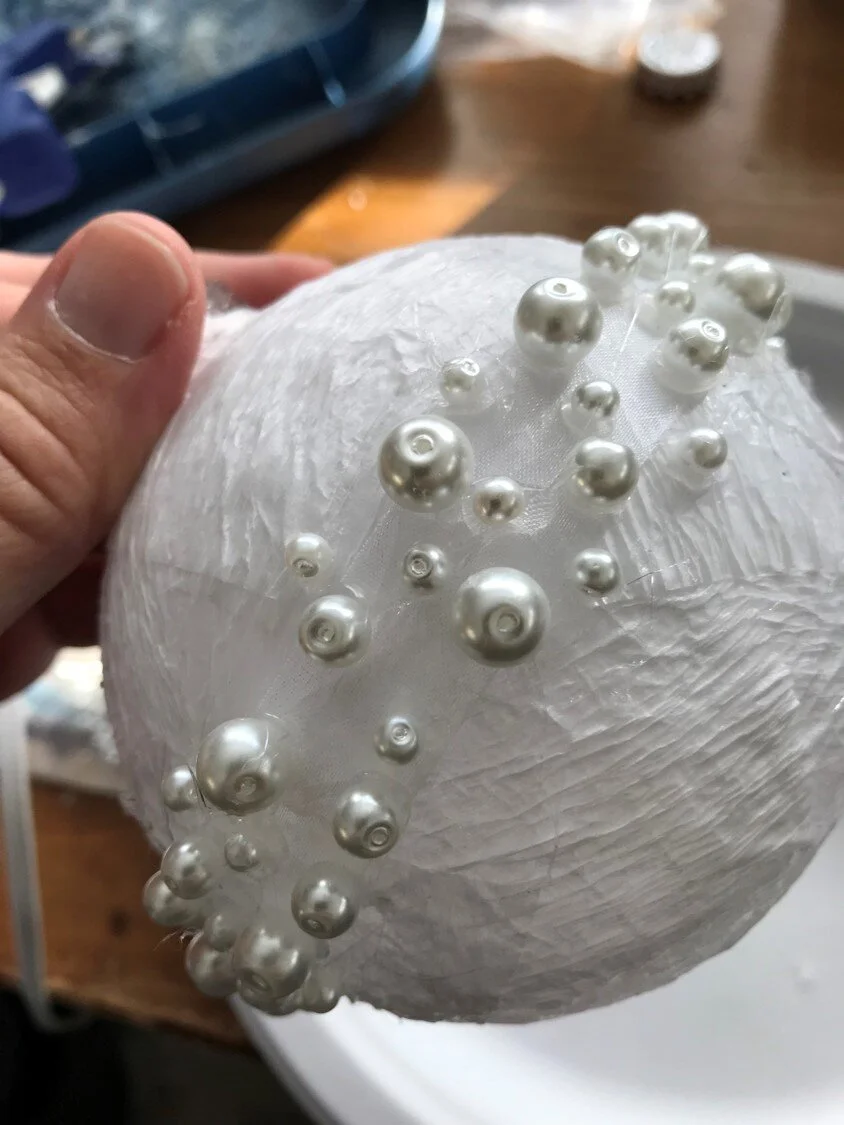
I glued mine in an offset pattern, one above and one slightly on an angle.
Glue the medium size next and the small last, filling in as much of the space as you want.
My beads were from the Dollar Tree and they came packaged as small medium and large in one package. I believe there were around 130 beads total. Great value for a buck.
I couldn’t find the link but they too will be in the craft isle at the store.
This last step is optional, but I wanted mine to be a bit more sparkly so I painted on one more layer of Mod Podge and sprayed the center of the ornament with some spray glitter that I’ve had for years.
It’s silver glitter and the Mod Podge will seal it so it won’t come off when dry.
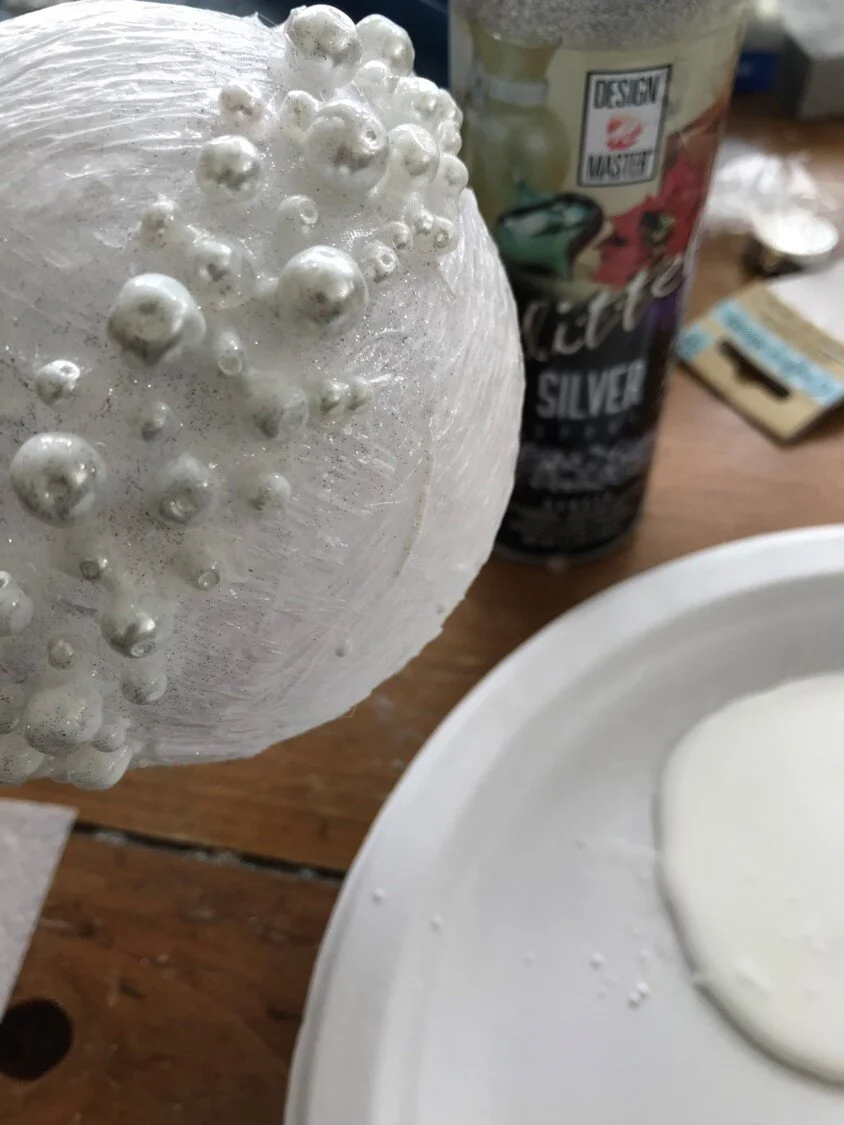
That’s it, you now have a beautiful beaded ornament that costs around $3.00!
Try to find that price point anywhere for such a pretty ornament.

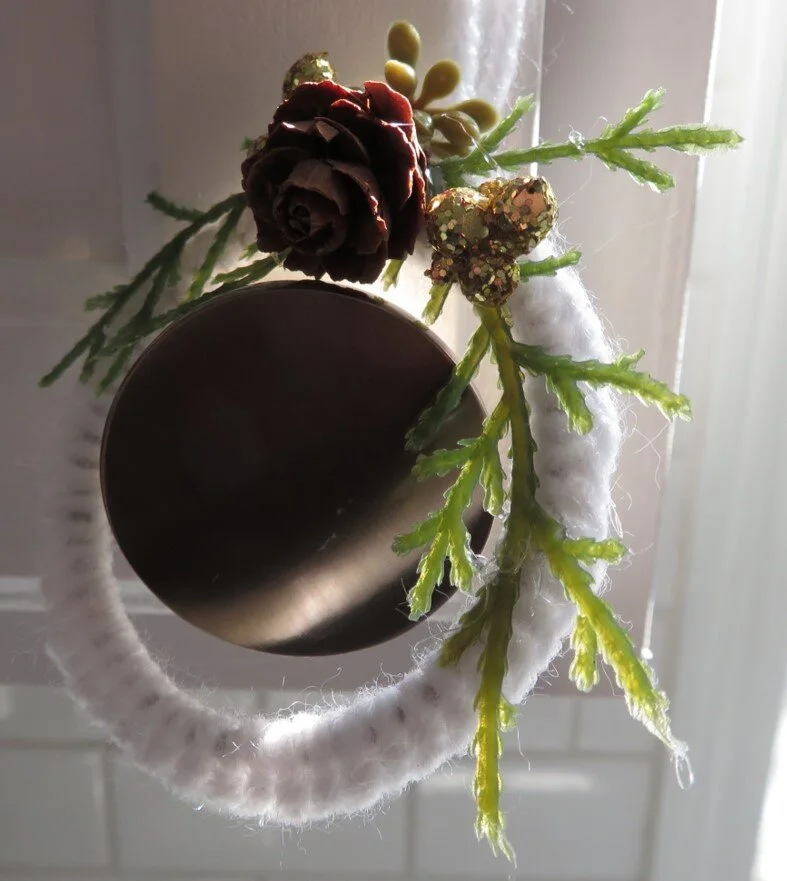
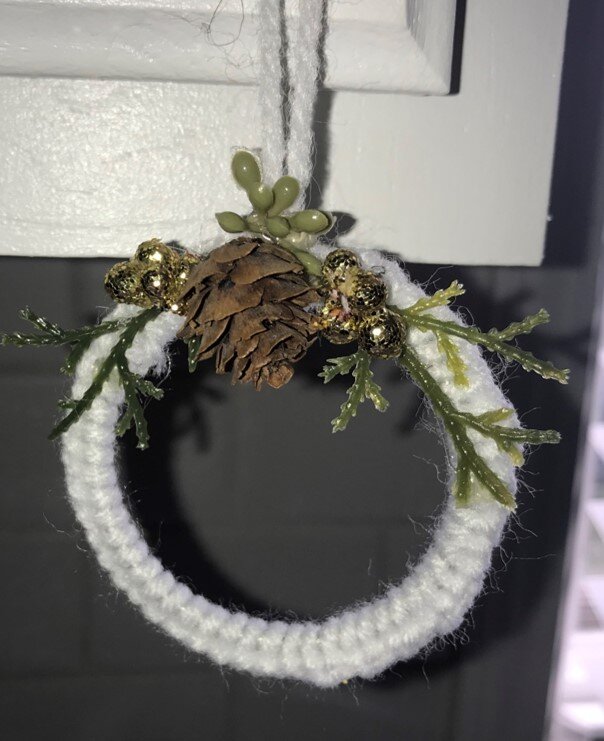
Mini Boho Wreath Ornament
For this ornament you’ll need:
Binder Ring(s) or any circular ring: Shower curtain ring, small embroidery hoop, etc.
Yarn, twine, string,
Miscellaneous small greenery
Tiny pine cones
Hot glue gun
Clear hot glue sticks

This is the only ornament that I created with everything that I already had in at home.
But, I know you can find all the supplies for this ornament at the Dollar Tree or on Amazon.
First, you’ll cut a lot of your yarn, string or twine and tie one end of it to your ring or hoop.

You want a lot of string because you’ll be knotting it all along the perimeter of the ring.
After you tie the knot, pull the pile of yarn or string up through the center of the ring.
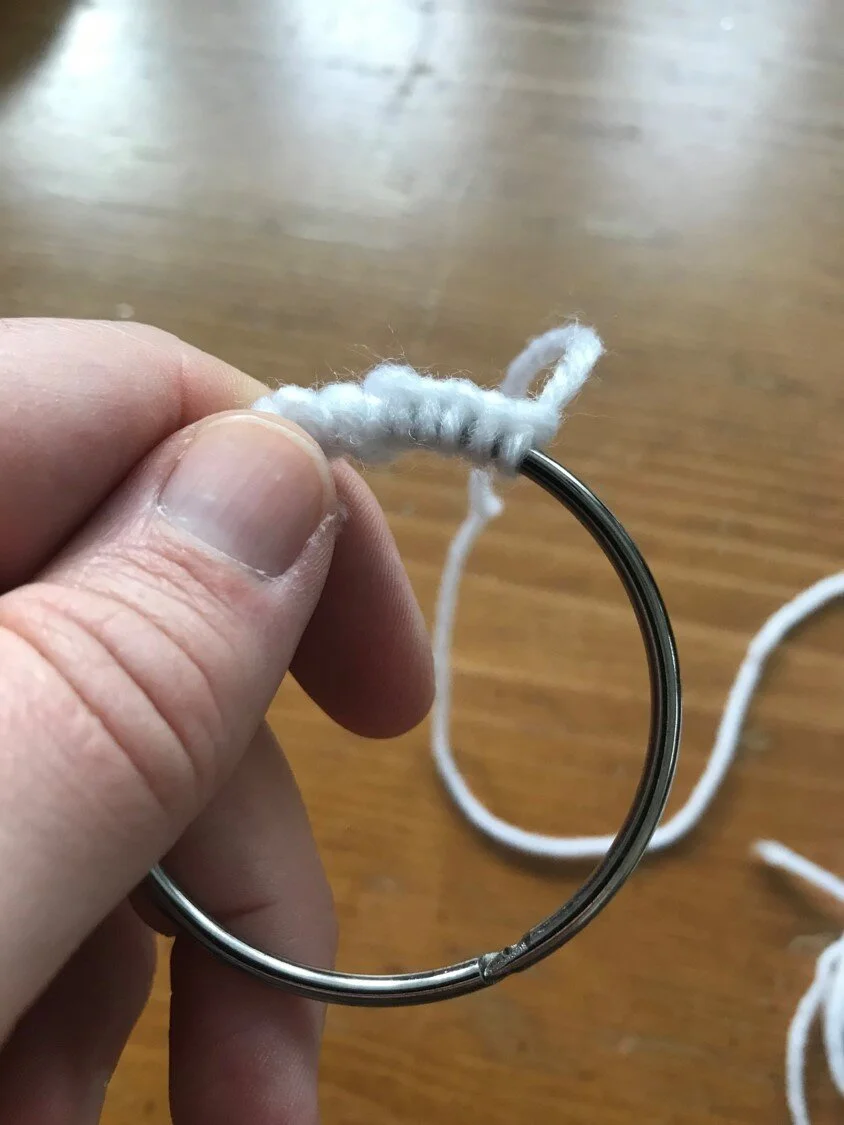
Then make a loop and pull it off to the side as shown here.

Now, pull the entire pile of yarn or string through the center of the loop.

Give it a tug to secure and repeat that same process all the way around the ring.

Embellish it by gluing some mini pine cones and greens onto it and you have a beautiful boho mini wreath ornament!
Snowy Bauble Ornament

If you want simple and super versatile, this ornament is all that and more.
I also love it because you can fill this ornament with ANYTHING that will fit through the opening at the top.
I’m partial to the snow scene but you can fill it with hot cocoa and mini marshmellos for a fun stocking stuffer or extra gift.
You can fill it with ribbon, confetti, glitter, paint, you name it. Go to town and get creative!
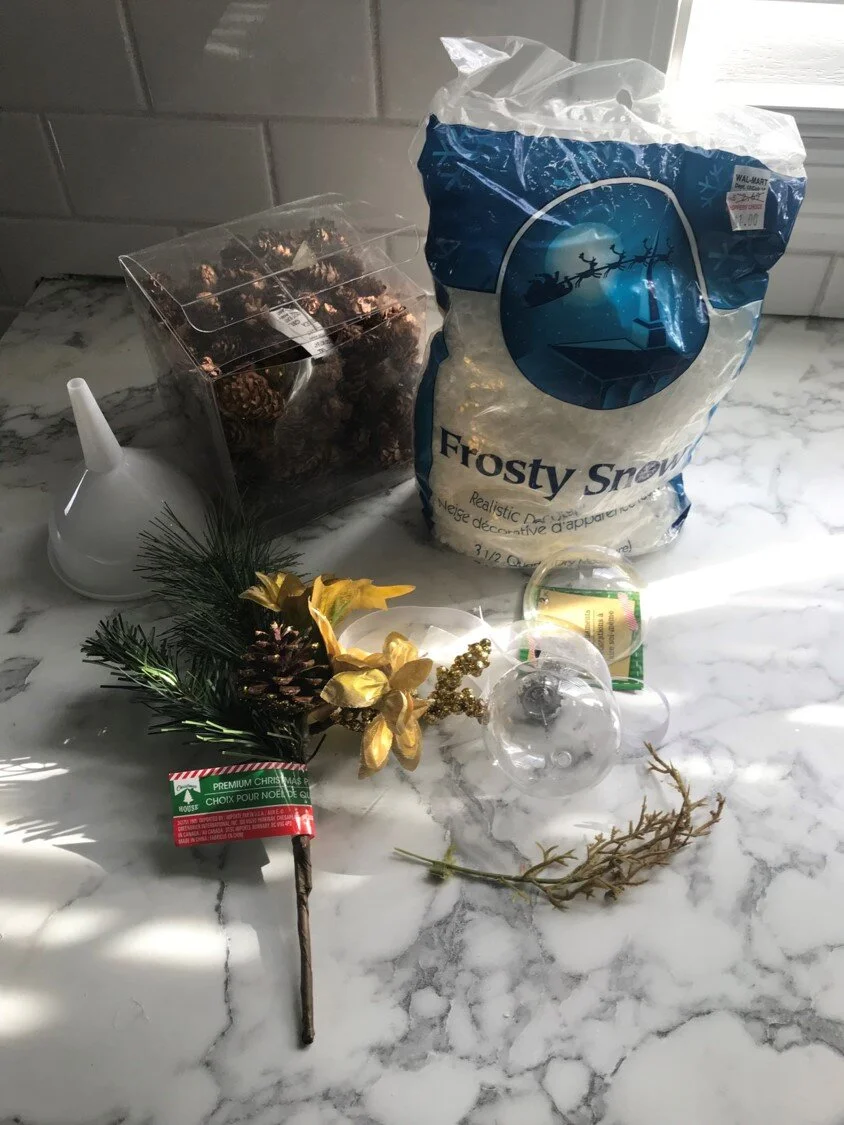
For this ornament you’ll need:
Your choice of greens and mini pinecones
Hot glue gun and clear glue sticks.
Ribbon or string for hanging
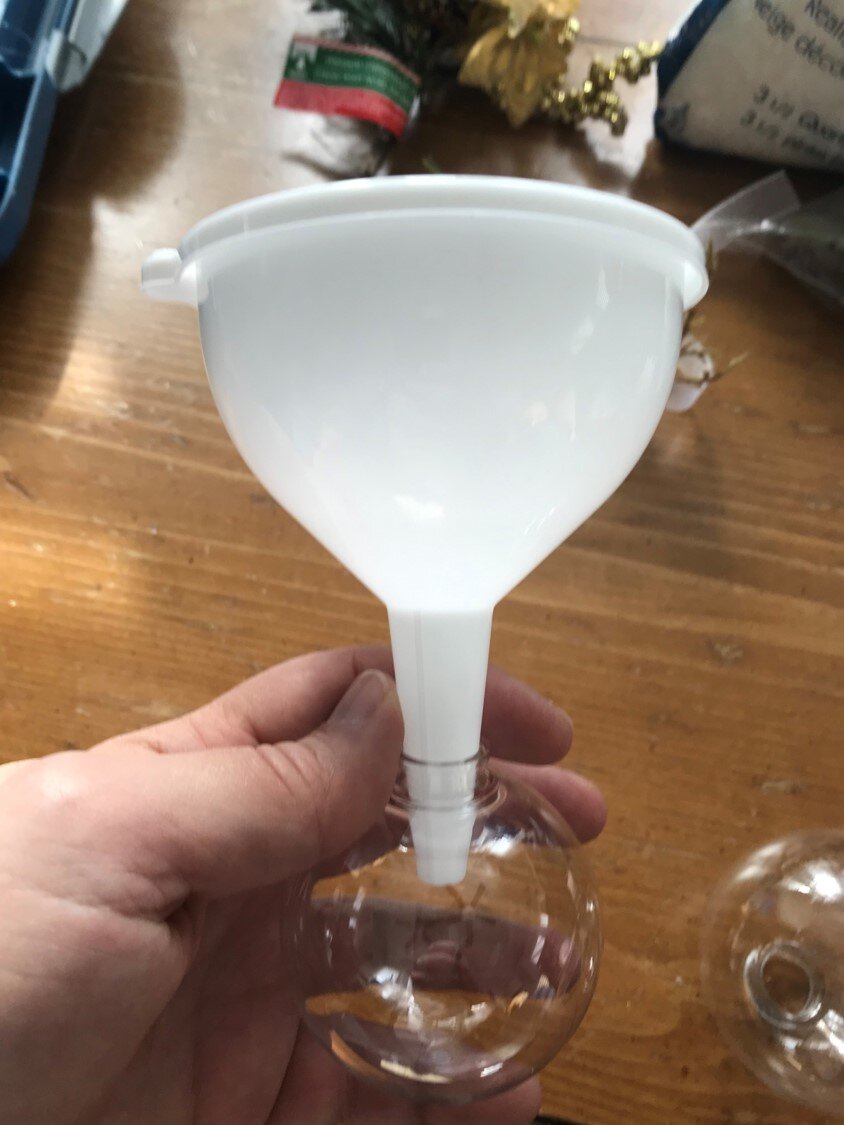
First up take the top of the ornament off and put it aside.
I like using the artificial snow in these ornaments because it’s super light weight and gives a nice amount of fill.
However, it is very messy to work with so using a funnel to fill the ornament is helpful.
Fill the ornament with the decorations you choose and embellish the top with a spring of green or anything else you want.

Viola! A snowy bauble that will catch the light and give you the perfect amount of sparkle for your tree.
Sparkly Succulent Textured Ornament

I think this is my favorite one so far. It’s a blue, sparkly succulent ornament that is meant to sit on a tree branch.
It’s super fun to make and will give you an excellent opportunity to bring in whatever accent color you want for your Christmas décor.
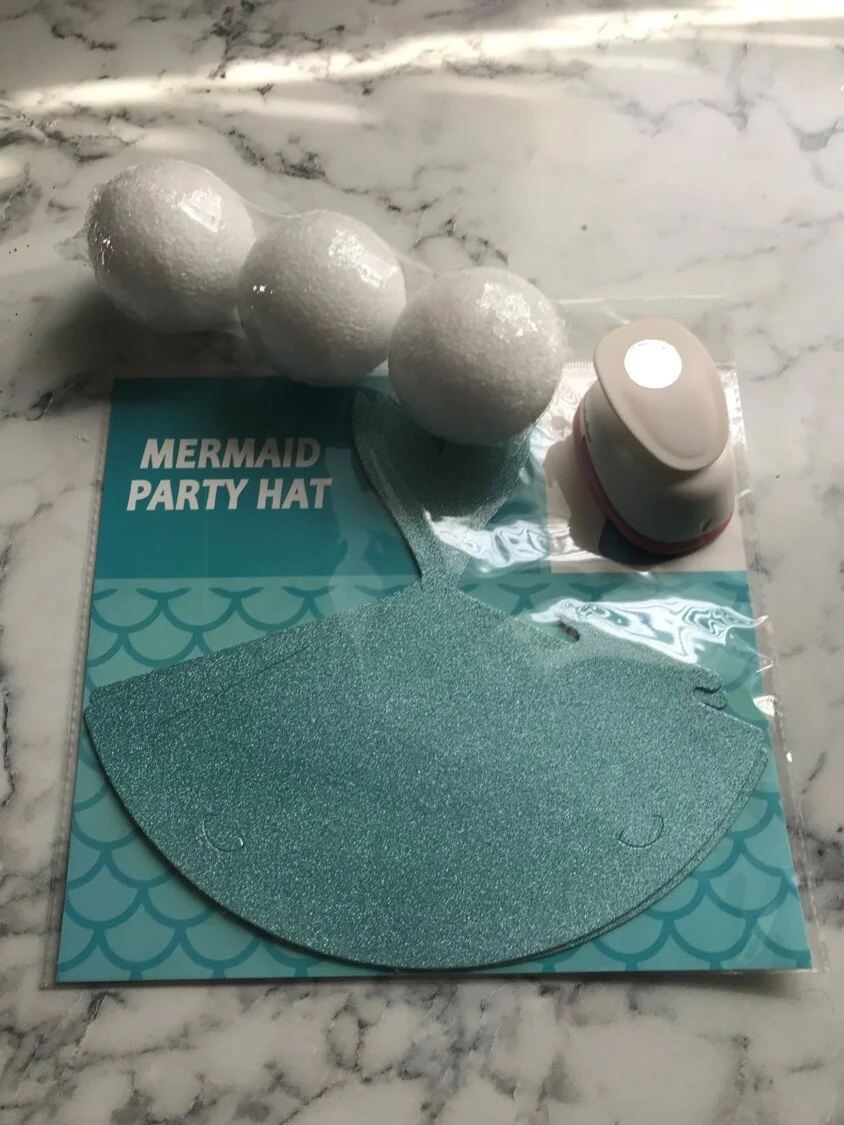
For this ornament you’ll need:
Mermaid Party Hat (Dollar Tree)
Hot glue gun and clear glue sticks.
So, I wasn’t able to find a link for this little party hat, but you can use any decorative paper you choose and the effect will be the same.
If you do go to the Dollar Tree to find the hat, it’s in the birthday party supply isle.
It just happens that my accent color this year is gray blue and this was the perfect hue so I snagged it when I was shopping.
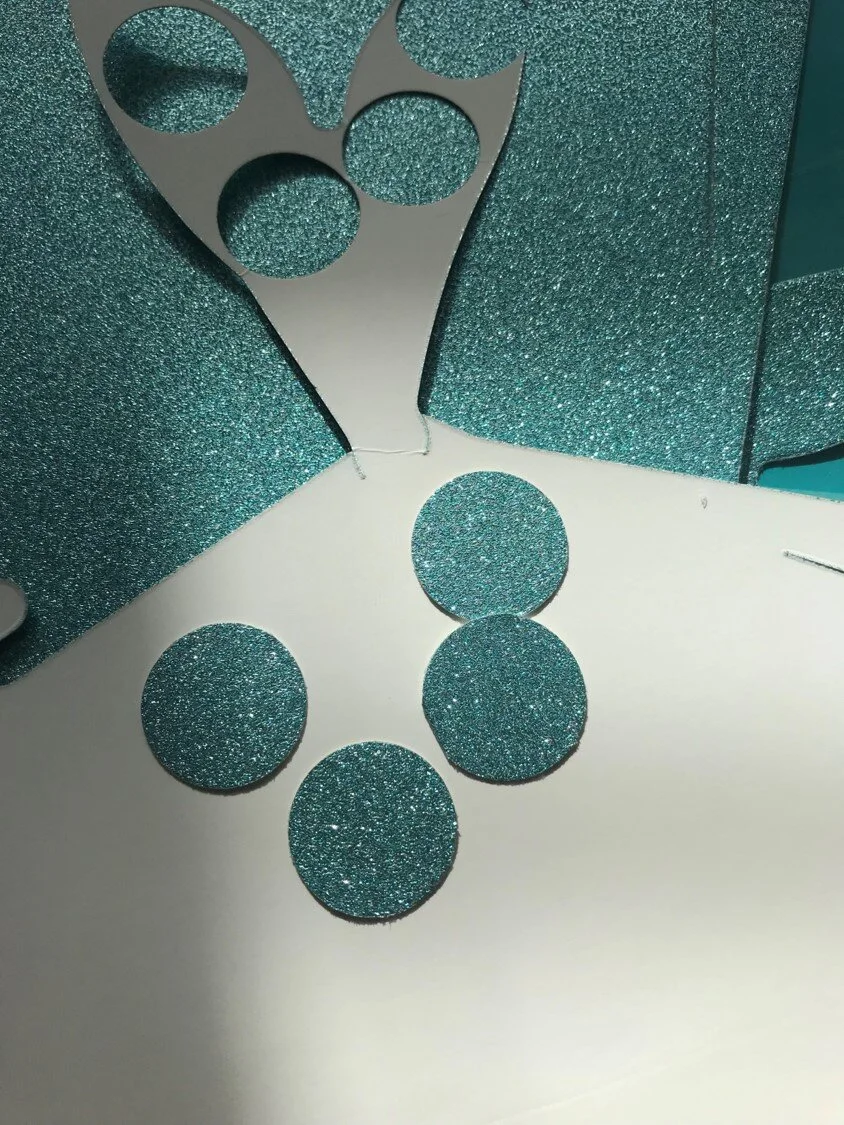
It’s as simple as taking your hole punch and punching out a bunch of round pieces.
I just watched some TV and punched away for about an hour.
If you’re able to find the Mermaid Hat at the Dollar Tree, you’ll be able to get 3 succulent ornaments out of 1 party hat package.
The next step is to start hot gluing the little round pieces of paper to the foam ball.

Start with one at the top and then fill in 4 around that first one making sure to overlap the previous one slighty.
Continue with that pattern all the way around the ball and you’ll see this cute abstract leafe pattern emerge.
Glue a section of leaf from one of your floral picks to the bottom of each one and you have a super cute, very custom succulent ornament!

That’s it, 5 Easy and Gorgeous DIY Christmas Ornaments Anyone Can Make!
I hope you enjoyed this second post for the start of the holiday season.
If you make any of these ornaments, please make sure to send me a link or tag me on Instagram, #interiorsmh.
I’d love to see your creations!
If you want more Christmas content, here’s a list of all the other posts to catch up on.
What to Read Next:
Tired of Red and Green Christmas Decorations?
Mercury Glass Candle Holders DIY
Gifts for Hard to Buy for People
Join the Fun!
If you enjoyed this post and you want to keep seeing my weekly blog, the best way to do that is to subscribe.
You can subscribe by downloading my 11 Secrets Only Designers Know to Make Your Space Rock. If you’re curious about how decorators and designers make a home look magazine ready, you’ll love taking a gander at these 11 secrets. You’ll learn how to style your room from the floor up and it will work for ANY space you have.
I write about small space design and decorating, sustainable furniture options, positive self care and a variety of do-it-yourself home décor.
I’d love to connect with you!
“This man is a plant shaman. He not only designs beautiful rooms, he’s got a green thumb that works like magic! My peace palm never looked better.”
“Michael Helped me to get my home office in magazine ready form. Thank you a million times for helping me figure this room out. It’s now my favorite room!”
Michael is Principal designer and blogger at Michael Helwig Interiors in beautiful Buffalo, New York. Since 2011, he’s a space planning expert, offering online interior e-design services for folks living in small homes, or for those with awkward and tricky layouts. He’s a frequent expert contributor to many National media publications and news outlets on topics related to decorating, interior design, diy projects, and more. Michael happily shares his experience to help folks avoid expensive mistakes and decorating disappointments. You can follow him on Pinterest, Instagram and Facebook @interiorsmh.