I love finding décor inspiration online.
It’s why I do what I do.
On any given day you can usually find me scrolling my favorite websites. I’m always looking for interesting colors, textures, new applications for various design principles.
But there’s no better time of year to window shop from my computer than Christmas time.
This year I am loving the simplicity of CB2’s ornaments. I am actually pretty obsessed with them.
I also think that many companies have their 2020 products right on par with the larger conversations going on in our world and that is brilliant!
It not only shows that the companies are listening to the world but that they are participating in the conversations.
The main conversation is unity.
I love that CB2 has embraced this sentiment, especially now.
The first 2 diy versions of these ornaments are my attempt to create home made versions that honor the same sentiments.
The third is all about my love for all things plants, specifically cactus plants.
If you’d like to try creating these simple and beautiful ornaments, then these are the diy’s to try!
If making is not your bag, I’ll include links to the actual pieces at CB2 so you can check them out.
Let’s get crafty!
Peace Sign Ornament

Source: CB2
If there ever was a year, in the 21’st century that needed some peace, it’s this year.
2020 has been a year like no other in many of our lifetimes.
It seems like in times of struggle, we go back to symbols that are meaningful and important to us.
For me, the peace symbol is comforting.
It universally signifies a message of understanding.
One that is inclusive and empowering.
One that waves a friendly hand welcoming anyone who shares those values like a friend.
For me, there’s no better symbol to remind all of us in 2020 that we can put aside our differences and embrace peace.
For this ornament you’ll need:
Sculpy oven bake clay
A rolling pin
Wax paper for rolling clay
Tin foil
A round object with a diameter of 3” to 4” to be traced
Floral or craft wire
Scissors
An oven

First, take a few sections of the sculpy clay and work it with your fingers to get it soft enough to work with.
Next, start rolling the clay on the wax paper to make snake like tubes that are as uniform in size as possible.
It’s important to put a barrier of wax paper on any surface that you want to protect because the polymer clay can stain surfaces like wood, or stone. Better safe than sorry.
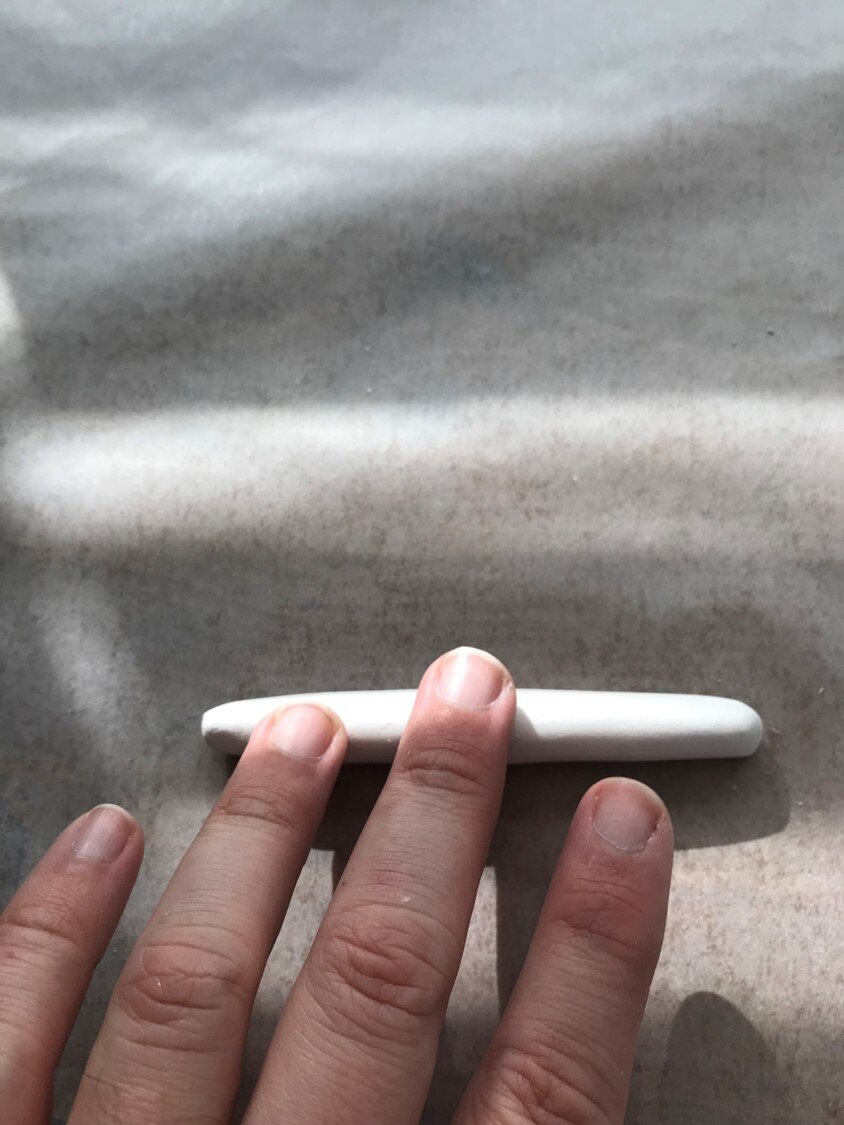
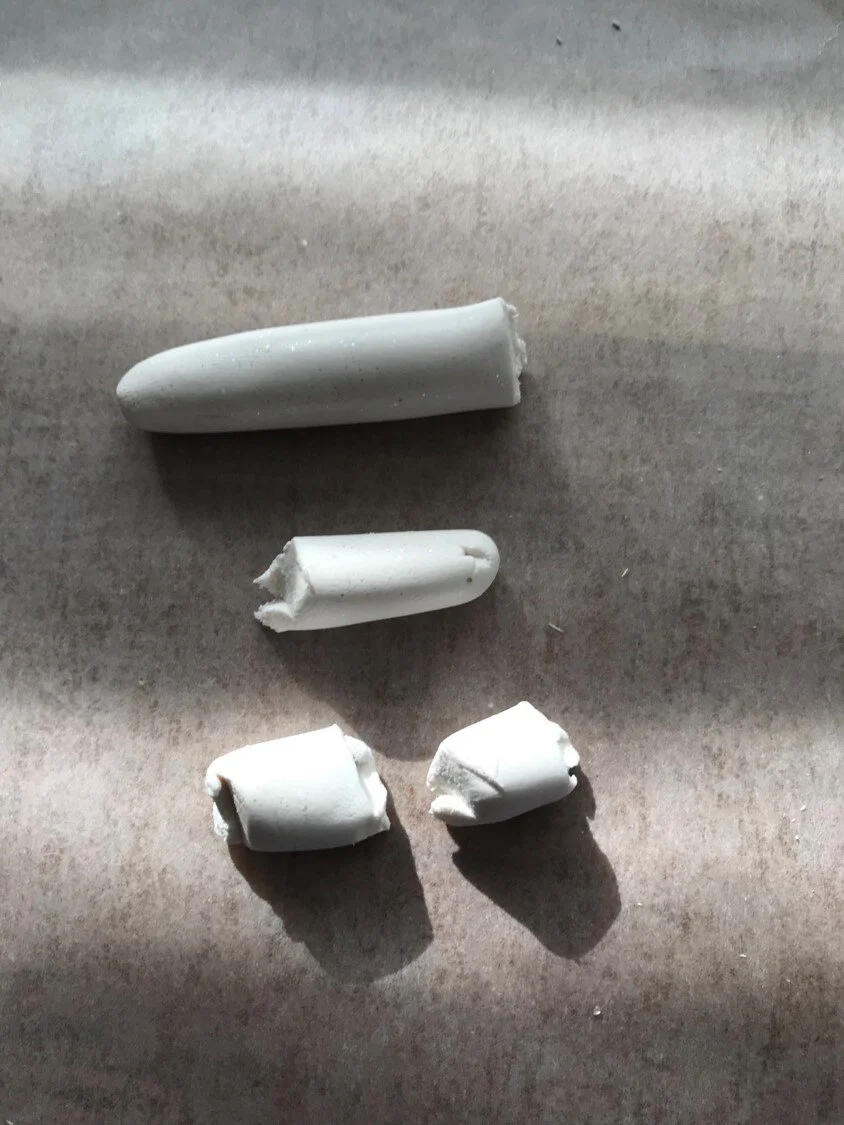
When I got the clay rolled out, I cut it into 4 sections, a large, medium and 2 small sections.

Segment rolled clay
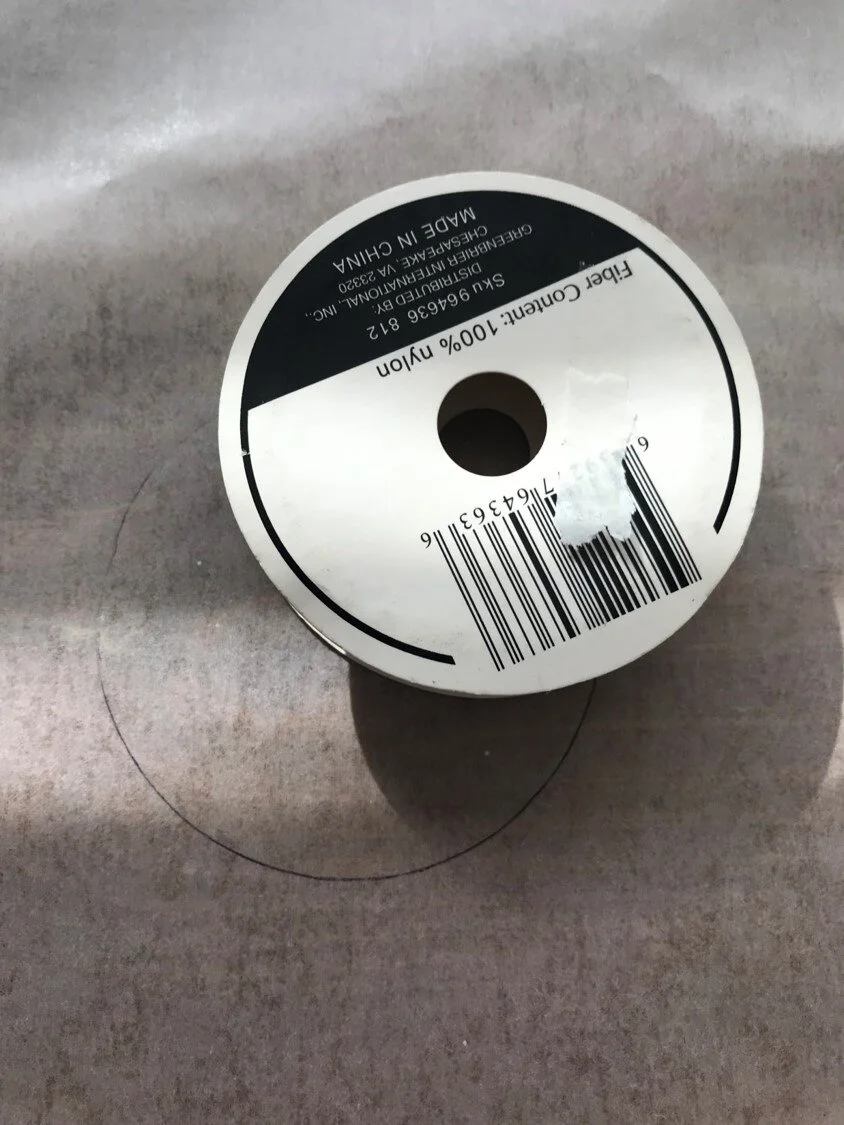
I then took my round object: in my case it was an empty spool from some ribbon.
It measures about 3” round.
I traced the circle on to the wax paper so that I can use it as a round template for my peace symbol.
Roll out the largest section clay into a thin tube and layer it around the circle you traced.
You’ll probably need to fuss with it to get it as close to a perfect circle as possible.
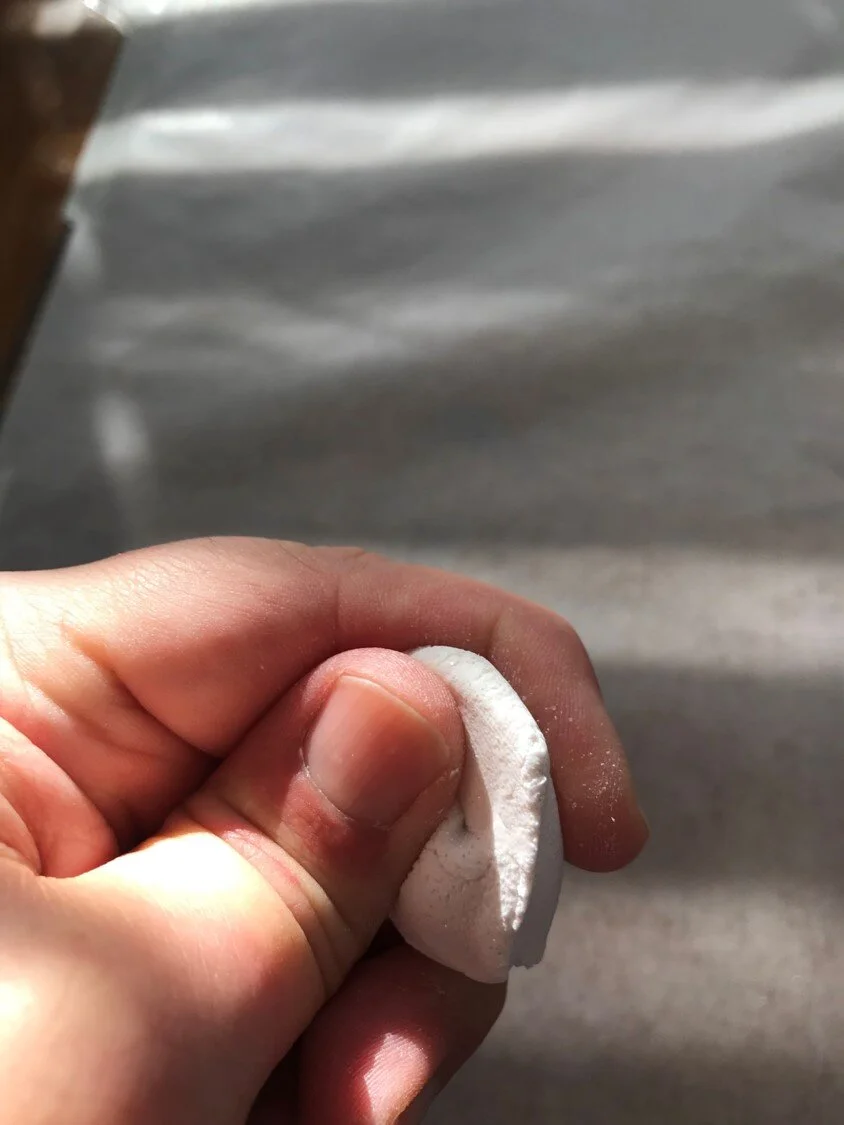
After that, roll out the medium size piece of clay for the vertical line of the peace circle and attach it to the top and bottom of the circle.
I found it helpful to smooth the edges down with the end of a paint brush to blend the pieces together.
Last, repeat that process with the 2 remaining small pieces to finish the peace symbol.
Once again, you’ll probably have to fuss with the dimensions to get it as round as possible.

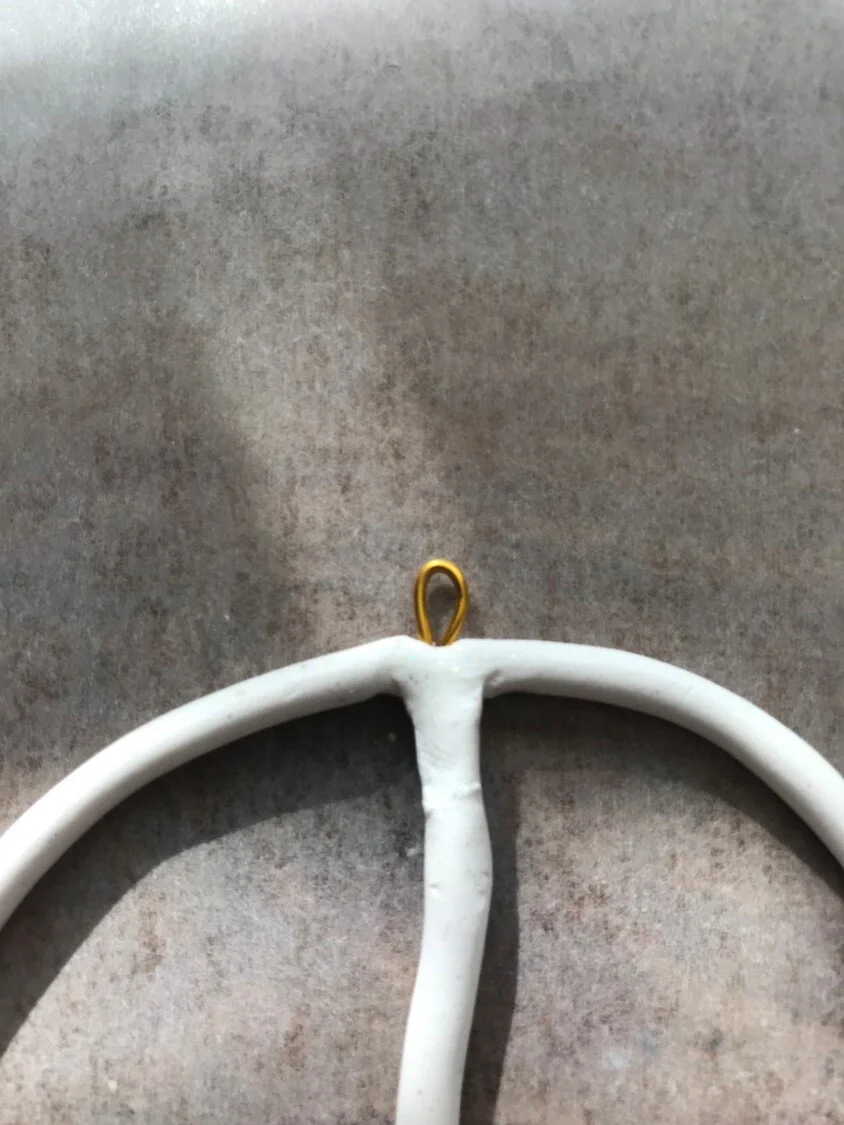
To make the small hanger attachment for the top, I made a little loop out of some wire I had in my craft drawer.
Floral wire or jewelry wire will work great too.
Cut the wire and shape it into a small loop.

Poke the long end of the wire through the top of the peace symbol making sure it doesn’t pierce through the clay.
Then preheat your oven to the recommended temperature on the clay package and bake.
Mine said to preheat the oven to 275 degrees Fahrenheit and bake for 30 mins.

Take it out of the oven, let it cool and then tie a simple sting to the loop and hang it on the tree.

Tag the Tree Ornaments
I instantly loved these simple punch pressed ornament banners when I saw them on the CB2 site.
Peace, joy and hope – there can be no better sentiments for this year, you know?
I think a group of these ornaments would make an excellent gift for anyone on your list.
If you’d like to create them yourself, here’s how:

Source: CB2
For this ornament you’ll need:
Sculpy oven bake clay
A rolling pin
Wax paper for rolling clay
Letter stencils
Tin foil
A small rectangular object to trace
A craft knife or butter knife
An oven
Gold spray paint

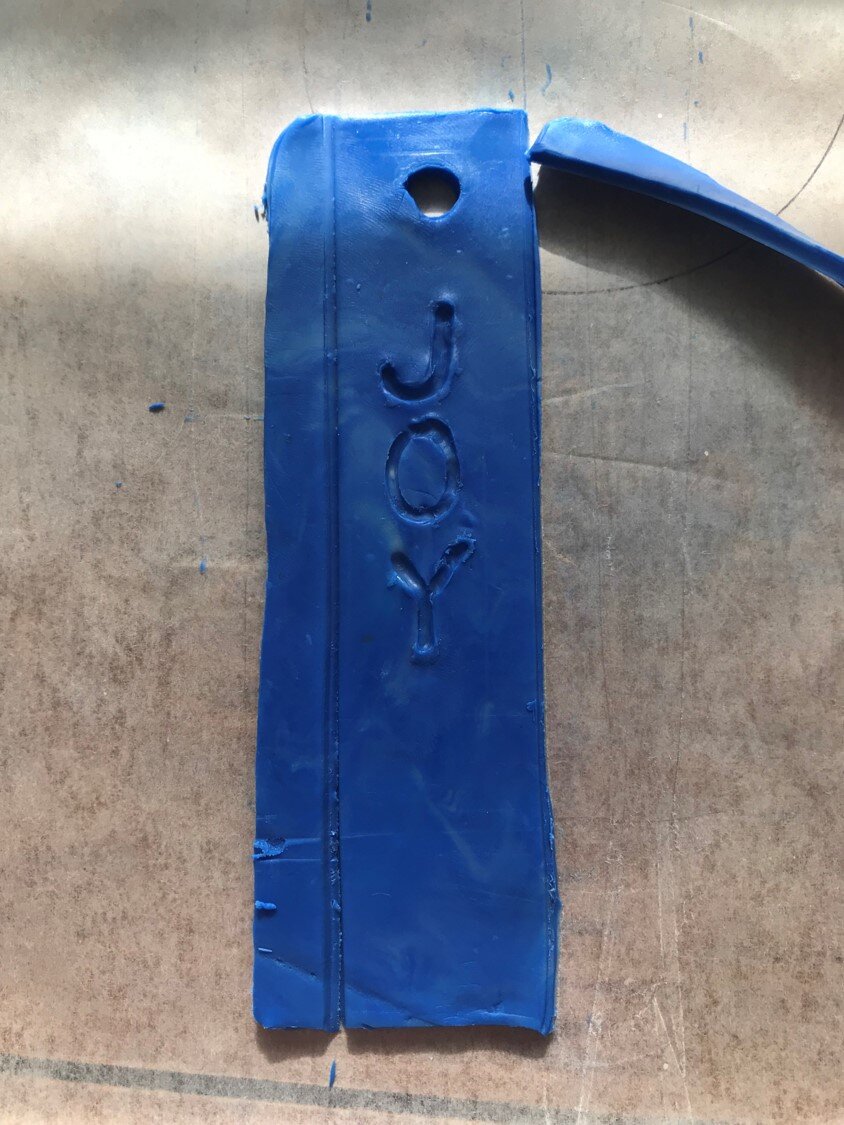
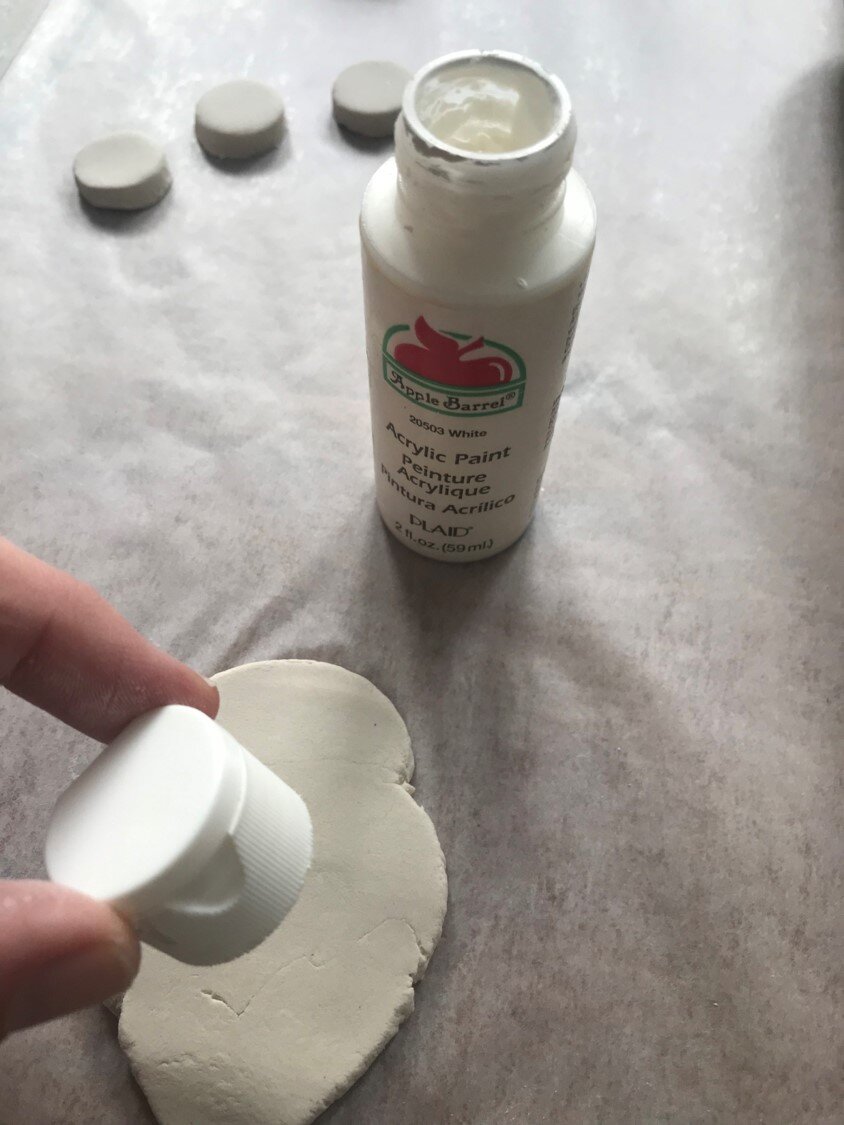
You can use any color of clay you choose because you’ll be painting the ornaments after you bake them.
Take your clay and work it with your hands until it’s soft, then roll it out so that it about the width of a pie curst, thin but not paper thin.
I had this little carton of picture hangers to use as my template to trace the shape of the ornament.
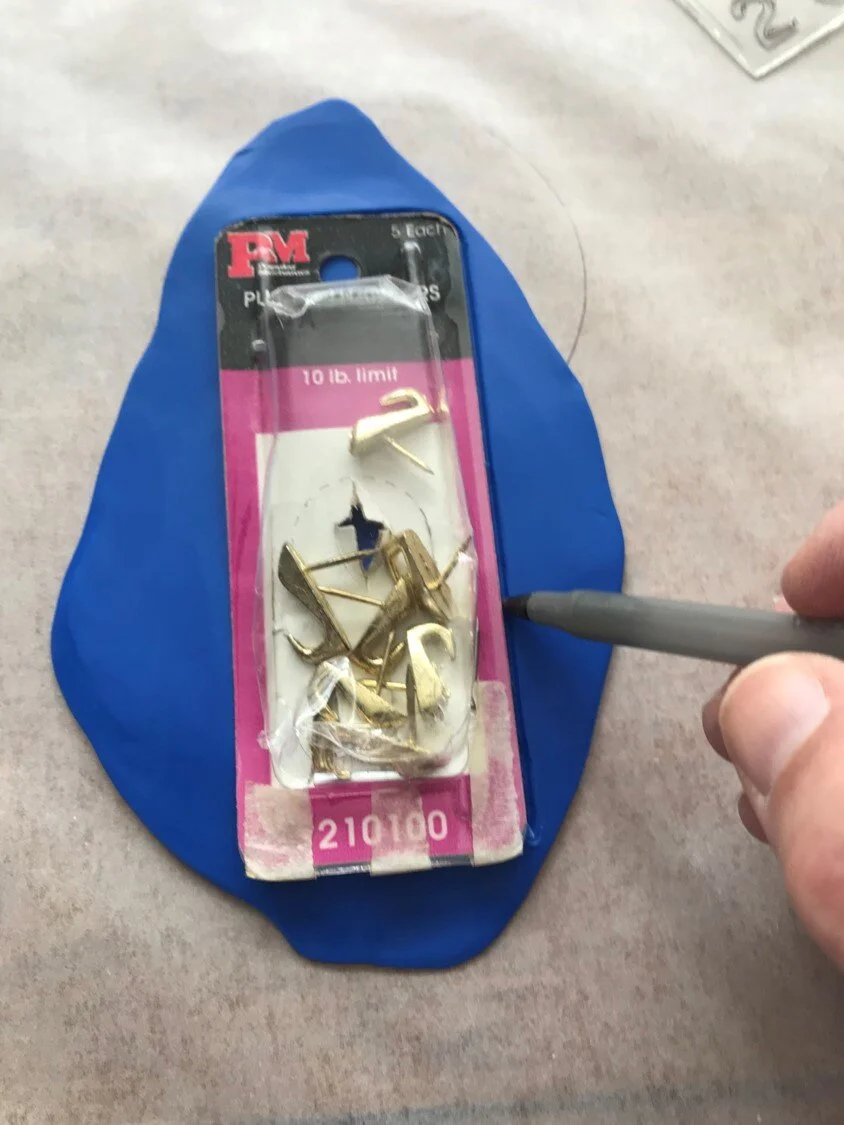
After you trace it out, trim the excess away with a craft knife and poke a small hole at the top so you can hang it later.

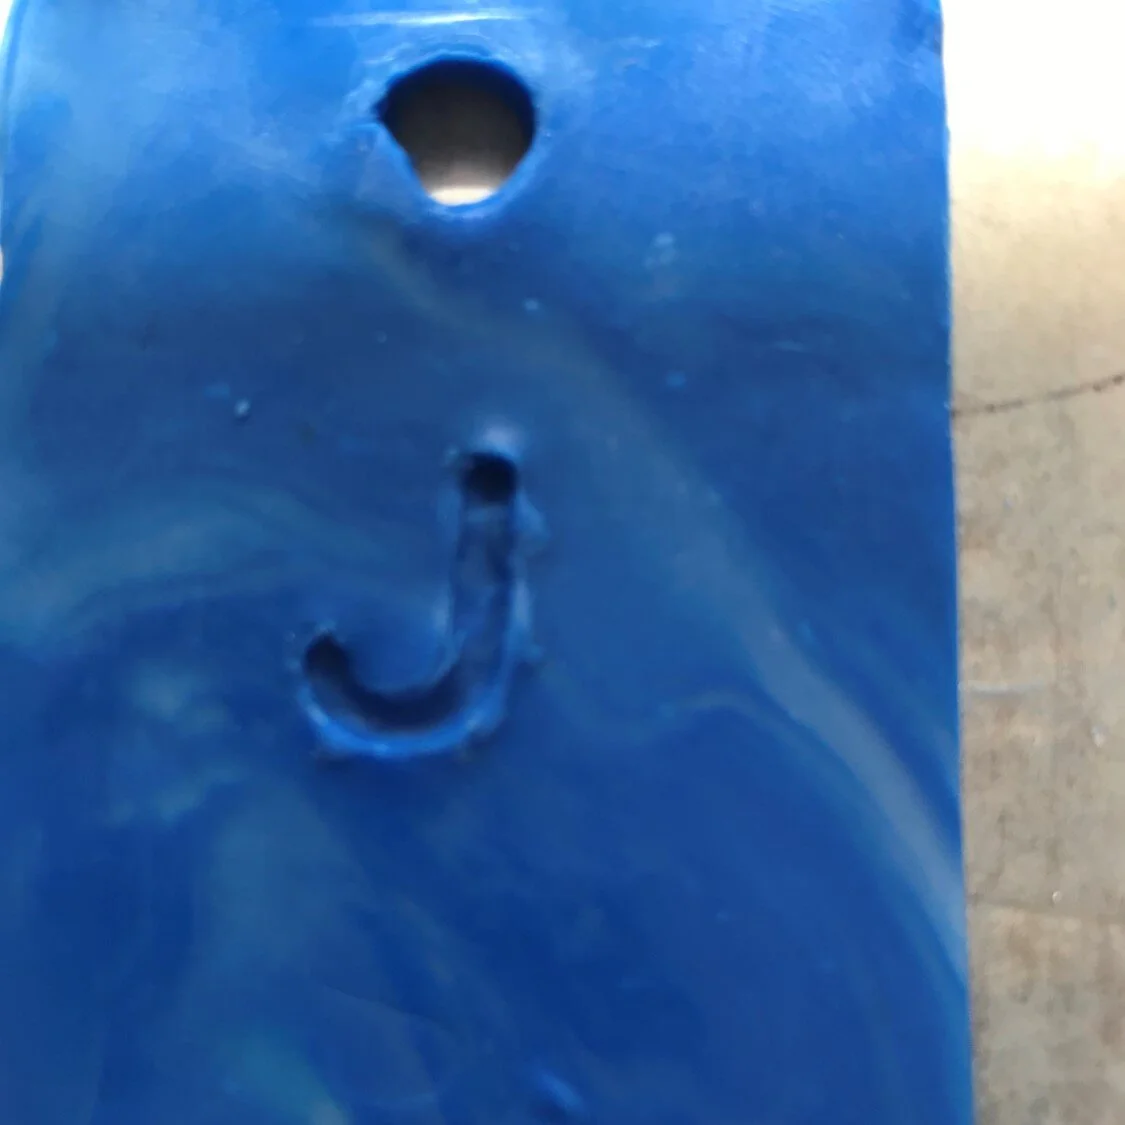
Now, decide on the word you want to write on the clay and start by lightly tracing it on to the clay.
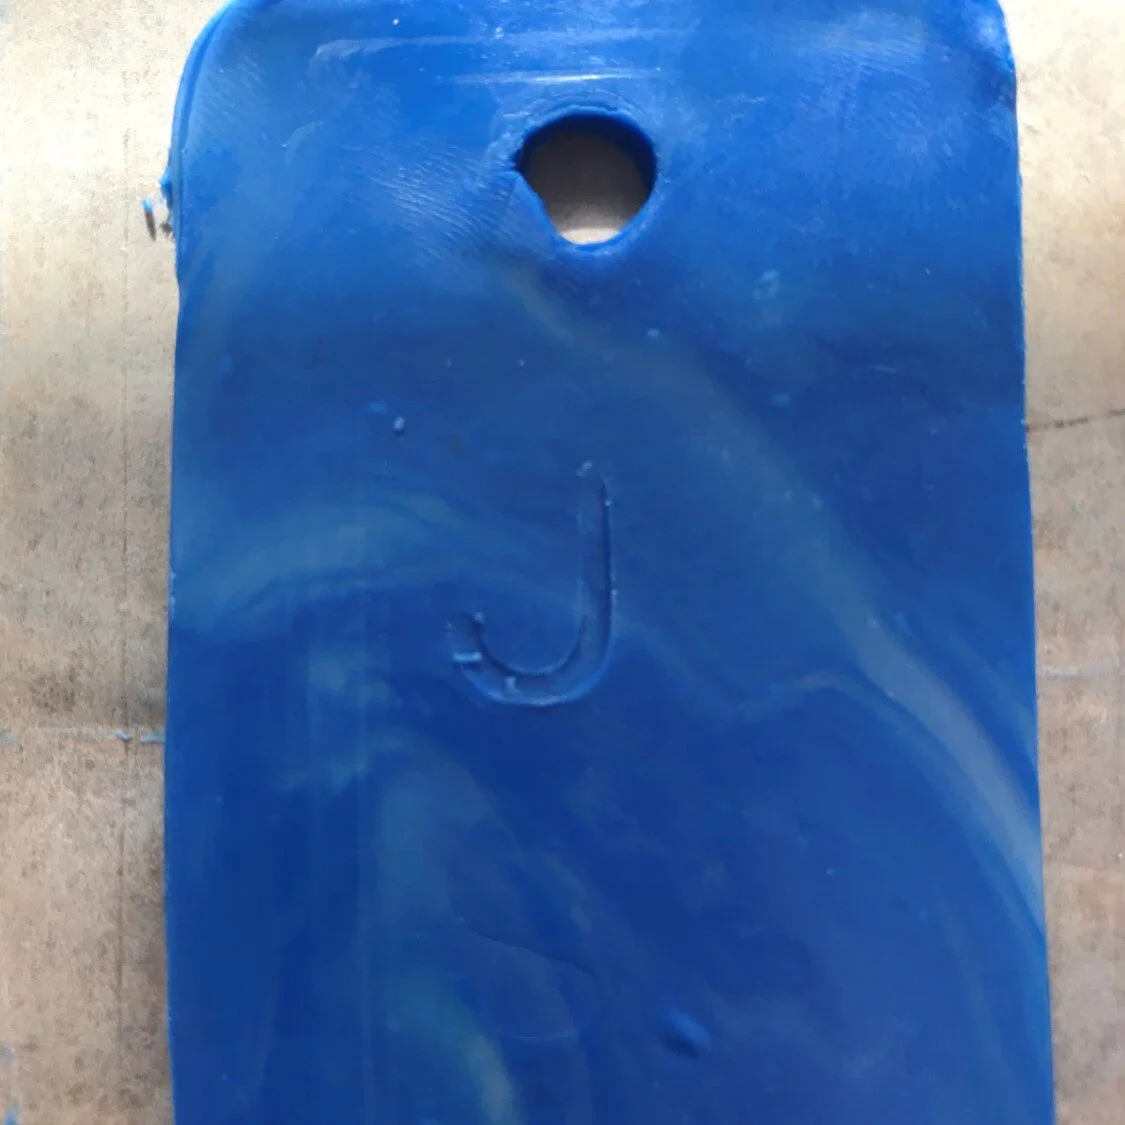
Then go over the lines of the letter with a little more pressure to define the shape of the letter into the clay.
Make sure not to press so hard that you go through the back.
After you trace it out, trim the excess away with a craft knife and poke a small hole at the top so you can hang it later.
Then preheat your oven and bake them per the instructions.

When they’ve cooled down, take them to a well ventilated area and give them a good spray with your gold spray paint.
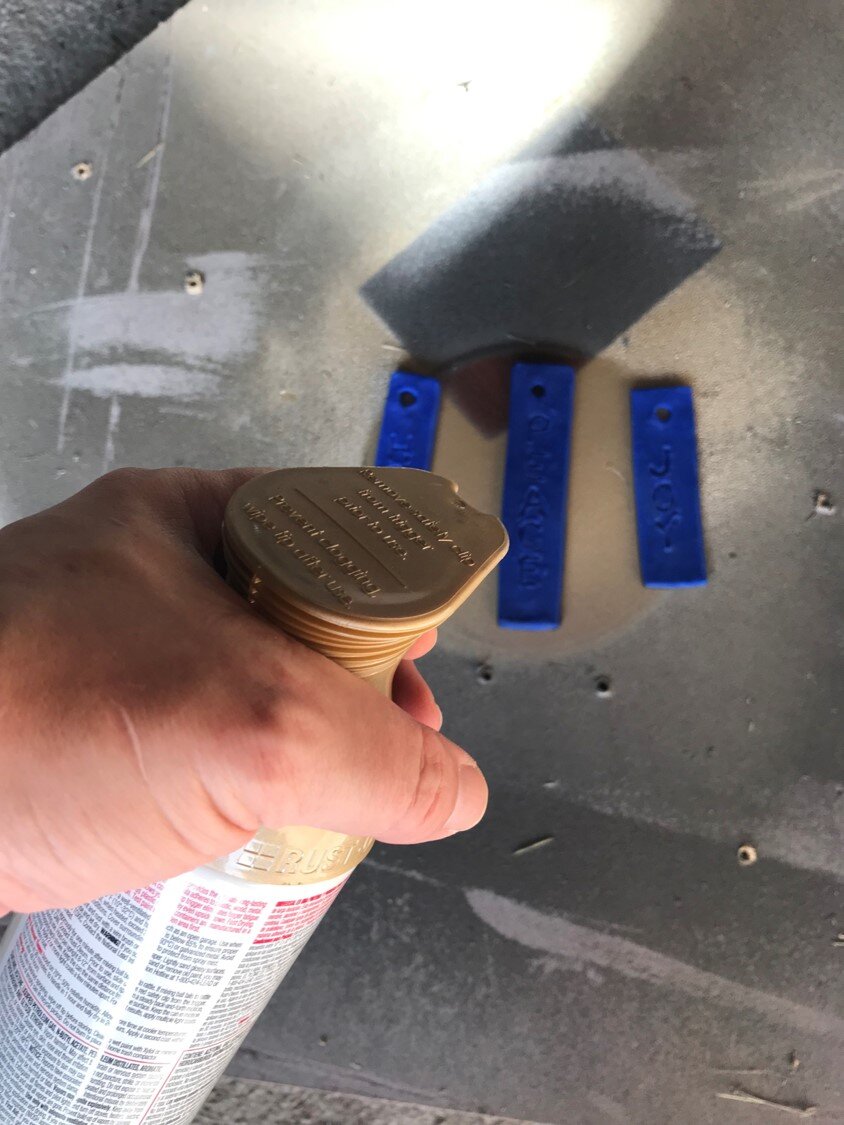
Let them dry and hang them on the tree with a string or ribbon.

Luster Cacti Ornaments
I have this thing for plants. I especially like cactus plants and succulents.
I should probably live in a desert climate…
Anyway, when I saw these simple, white cactus ornaments I was immediately smitten!
I tried getting the shapes exactly like the original but I found it to be difficult.
If I had to do it over again, I would try to find some silicone molds to really get the details and all the shapes just right.

Source: CB2
For this ornament you’ll need:
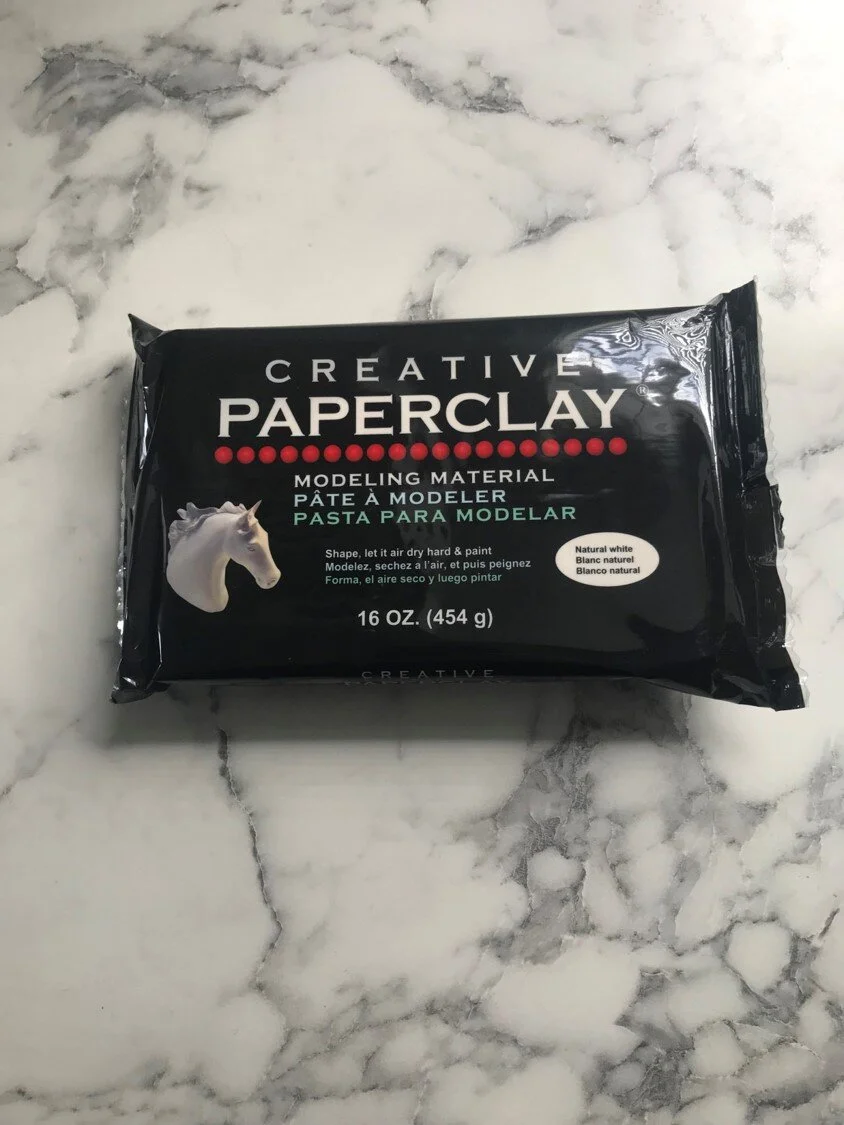
Air dry clay
A rolling pin
A soda bottle lid or any small round object to do cut out shapes in the clay
A craft knife
A small bowl of water
A fine paint brush
Small beads
A small bottle of gloss Mod Podge
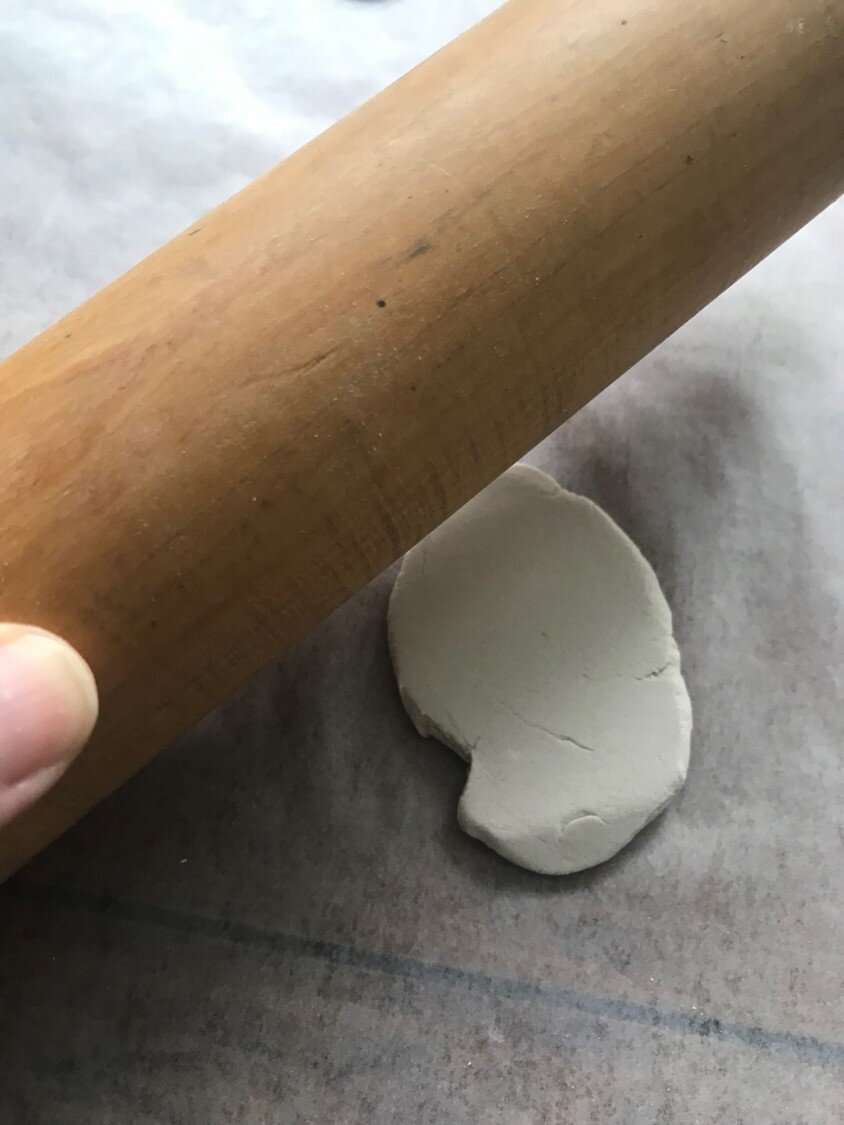
Roll out a small section of the clay to the thickness of a pie crust.
For the first cactus ornament I used the top of a small acrylic paint bottle to cut out round shapes.
I then used a craft knife to cut some of the circles in half.
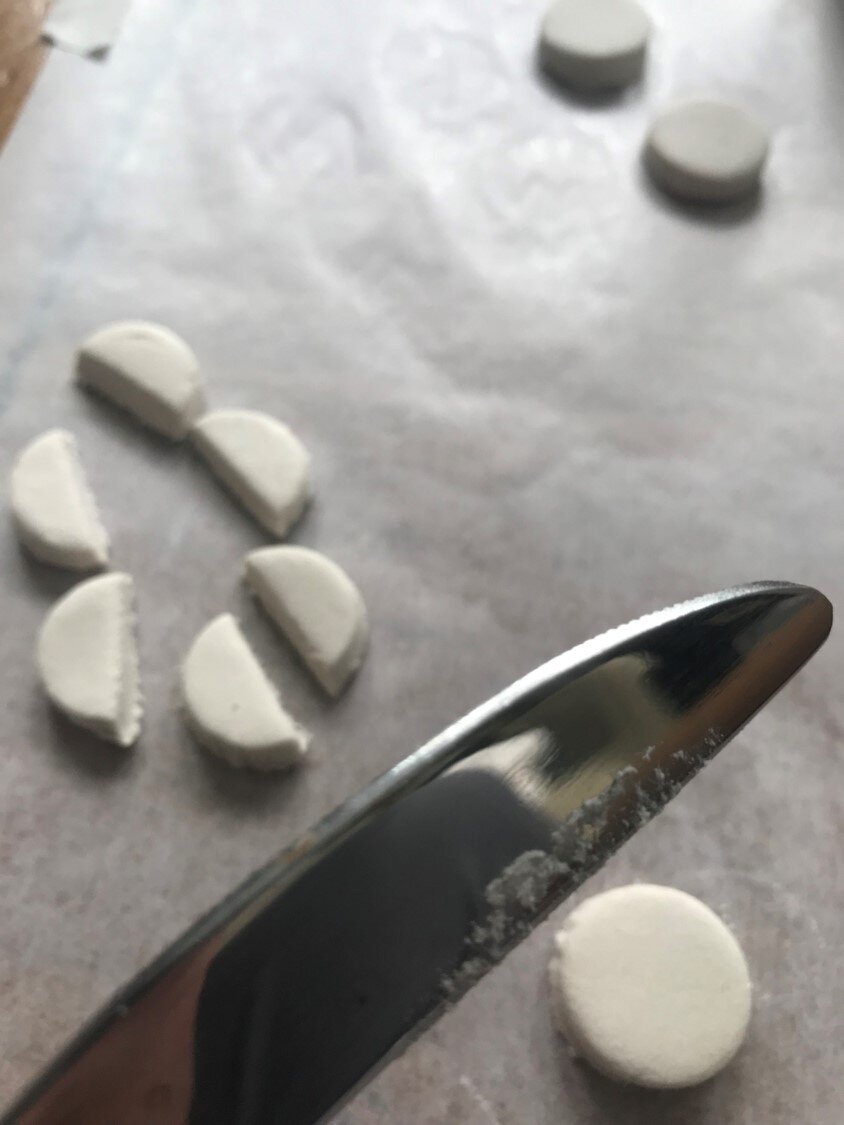
I stuck two halves together using a thin line of clay as glue.
I then wet the clay with a paint brush dipped in water to smooth out the joint.

I then stuck four halves together by sculpting them together and them layering a slightly larger version of the same group on the bottom.

Last, I took some small beads and I lined them on the edges of the cactus.
(You’ll use more beads as the cactus spikes on the remaining two ornaments as well.)

For the next two cactus ornaments I free hand molded the shapes.
I didn’t love the way the first two turned out, but the traditional desert cactus turned out pretty close to the original.
Can’t win them all.

For this one I tried shaping the clay as close to the original cactus ornament as possible. It got a little wonky but it came together in the end.
Don’t forget to make another small wire loop for all the ornaments and insert it while they’re still wet clay.

This little desert cactus tree was my favorite.
It was easy to sculpt and I think the ridges really added to the authenticity of it.
I let them dry for 2 days and them I painted on a thick layer of gloss Mod Podge to make them look a bit more like porcelain.

I put them off to the side so the layer of Mod Podge would dry.

Then the only thing left to do is tie a sting to the small wire loop and hang them up to enjoy!

That’s it!
3 simple and beautiful CB2 inspired Christmas ornaments.
I’d love to see if you made any of these fun holiday projects.
Feel free to tag me, @interiorsmh on Instagram and show off your diy skills!
In case you missed last week’s diy Christmas ornament post, you can catch that here.
Join the Fun!
If you enjoyed this post and you want to keep seeing my weekly blog, the best way to do that is to subscribe.
You can subscribe by downloading my 11 Secrets Only Designers Know to Make Your Space Rock. If you’re curious about how decorators and designers make a home look magazine ready, you’ll love taking a gander at these 11 secrets. You’ll learn how to style your room from the floor up and it will work for ANY space you have.
I write about small space design and decorating, sustainable furniture options, positive self care and a variety of do-it-yourself home décor.
I’d love to connect with you!
“This man is a plant shaman. He not only designs beautiful rooms, he’s got a green thumb that works like magic! My peace palm never looked better.”
“Michael Helped me to get my home office in magazine ready form. Thank you a million times for helping me figure this room out. It’s now my favorite room!”
Michael is Principal designer and blogger at Michael Helwig Interiors in beautiful Buffalo, New York. Since 2011, he’s a space planning expert, offering online interior e-design services for folks living in small homes, or for those with awkward and tricky layouts. He’s a frequent expert contributor to many National media publications and news outlets on topics related to decorating, interior design, diy projects, and more. Michael happily shares his experience to help folks avoid expensive mistakes and decorating disappointments. You can follow him on Pinterest, Instagram and Facebook @interiorsmh.