If there's one thing I've learned from years of working with homeowners with small spaces, it's that sometimes the most impactful additions come in modest packages. A 10' x 10' deck might sound unassuming, but this versatile outdoor platform can completely transform how you experience your home—without breaking the bank or requiring professional contractors.
At just 100 square feet, this "Goldilocks" deck size is just right: substantial enough to create a true outdoor room but small enough to be a manageable DIY project.
Let’s talk about the best materials for building a deck, compare costs, how easy each material is to work with, and how long a deck will last when maintained.
Here’s everything you need to know about creating your perfect outdoor extension!
Choosing Your Deck Material: The Foundation of Success
Before you pick up a single tool, you need to make perhaps the most critical decision of your deck project: what material to use. This choice affects not just your upfront costs, but also how your deck will look, feel, and perform for years.
Wood Options: The Classic Choice
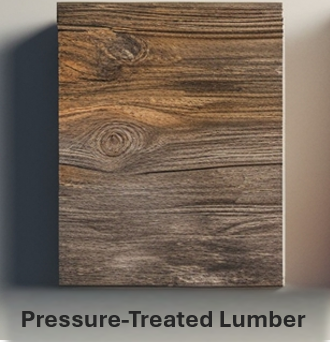
Pressure-Treated Lumber
Cost: $2-$5 per square foot
Pros:
Most budget-friendly option (saving $300-600 compared to cedar on a 10x10 deck)
Widely available at any home center or lumber yard
Accepts stain and paint easily for customizable appearance
Strong structural properties for supporting furniture and foot traffic
Chemical treatment provides good resistance to insects and fungal decay
Cons:
Requires annual cleaning and sealing to maintain appearance and prevent moisture damage
Can warp, crack, and splinter over time, particularly in extreme climate shifts
Often feels rougher underfoot than other options (not ideal for barefoot traffic)
Contains chemical preservatives that some homeowners prefer to avoid
Tends to shrink and expand more noticeably with humidity changes
Lifespan: 15-20 years with proper maintenance
Cedar
Cost: $4-$8 per square foot
Pros:
Contains natural oils that resist rot, decay, and insect damage without chemical treatment
Beautiful rich color and grain pattern that creates a premium, natural appearance
Minimal warping and checking compared to pressure-treated lumber
Feels smoother underfoot and doesn't splinter as readily as pressure-treated wood
Lightweight and easy to cut and handle during installation
Pleasant natural aroma that many homeowners enjoy
Cons:
Significantly higher cost than pressure-treated lumber
Will fade to a silvery gray without UV protection treatments
Requires refinishing every 1-2 years to maintain original color
Softer wood that can dent and scratch more easily than other options
Not as readily available in all regions, which can impact pricing further
Lifespan: 20-25 years with proper care
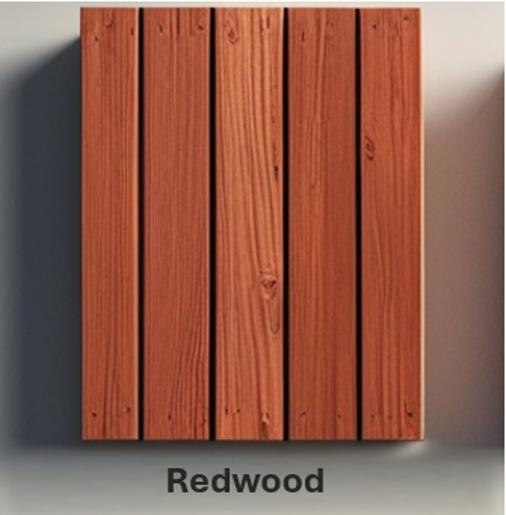
Redwood
• Cost: $7-$10 per square foot
• Pros:
Superior natural beauty with rich, distinctive reddish-brown tones
Exceptional dimensional stability with minimal warping even in changing climates
Highest natural resistance to decay and insects among common wood options
Dense grain pattern resists scratches and dents better than cedar
Less prone to surface checking and cracking than other woods
Premium appearance that adds significant resale value to your home
Cons:
Premium price point (a 10x10 deck can cost $700-1000 in materials alone)
Limited availability in many regions, especially East Coast and Midwest
Still requires annual maintenance to preserve color and appearance
Despite natural resistance, still vulnerable to surface weathering and UV damage
Sustainably sourced options are increasingly difficult to find and more expensive
Lifespan: 25-30 years with proper maintenance
Just like choosing fabric for outdoor furniture, selecting wood for your deck means balancing appearance with practicality. That gorgeous redwood might be calling your name, but if you live in a climate with harsh winters and high humidity, you might find yourself spending more time maintaining it than enjoying it.
Non-Wood Options: The Low-Maintenance Alternative
Composite Decking
Cost: $7-$12 per square foot
Pros:
Requires virtually no maintenance beyond occasional cleaning with soap and water
Never needs staining, sealing, or refinishing throughout its lifetime
No splinters, making it ideal for families with children or for barefoot use
Available in dozens of colors and textures to mimic various wood species
Consistent quality without knots, splits, or defects found in natural wood
Most brands include warranties of 25+ years, providing peace of mind
Resists fading, staining, and scratching far better than natural wood
Cons:
Can retain heat in direct sunlight, making it uncomfortable to walk on during peak summer days
Surface cannot be refinished if damaged or if you want to change the color
Premium brands cost significantly more than pressure-treated lumber
May look obviously synthetic, especially with less expensive products
Heavier than wood, making it more challenging for DIY installation
Can develop mold in shaded, damp areas if not properly ventilated
Lifespan: 25-30 years
PVC Decking
Cost: $8-$13 per square foot
Pros:
100% synthetic material is completely impervious to water, making it ideal for pool surrounds or very wet climates
Extremely resistant to staining from food, drinks, and sunscreen
Lightest weight of all decking materials, making installation easier
Won't support mold or mildew growth, even in consistently damp environments
Available in slip-resistant textures for safety around water features
Never absorbs moisture, so no expansion/contraction issues with seasonal changes
Often includes the longest warranties in the industry (30+ years)
Cons:
Most artificial appearance among decking options
Limited color options compared to composite decking
Can become brittle and noisy in extremely cold climates
Prone to static electricity buildup in dry conditions
Difficult to repair if damaged - often requires replacing entire boards
Higher expansion/contraction rate with temperature changes
Less environmentally friendly as it's a petroleum-based product
Lifespan: 25-30 years
Aluminum Decking
Cost: $15-$20 per square foot
Pros:
o Extremely durable - will not rot, rust, warp, splinter, crack, or fade
Completely fireproof, providing safety advantages for homes in wildfire-prone areas
Surprisingly cool to the touch even in direct sunlight due to heat dissipation properties
Powder-coated finishes available in various colors that never need repainting
100% recyclable and often made from recycled materials
Interlocking systems create waterproof surfaces, protecting areas underneath
Highest strength-to-weight ratio of any decking material
Impervious to insects, mold, and mildew
Cons:
Highest initial cost of all decking materials (typically 2-3x the cost of pressure-treated lumber)
Creates noise during rain or hailstorms unless properly insulated
Industrial appearance doesn't appeal to all homeowners
Specialized fastening systems can make DIY installation challenging
Can feel cold underfoot in cooler weather
Scratches and dents cannot be sanded out like wood can
Limited design flexibility compared to wood products
Lifespan: 40+ years
For those of you who cringe at the thought of power washing and staining a deck every couple of years, these modern alternatives might be worth the higher upfront cost. They require a bigger investment now in exchange for years of worry-free enjoyment later.
Climate Considerations: What Works Where You Live
Four Season Climates If you experience freezing winters and hot summers (like many of my readers in the Northeast and Midwest), composite or PVC decking offers the most consistent performance. For wood lovers, pressure-treated lumber actually performs quite well in these conditions—just be prepared for annual maintenance.
Humid Climates In areas with high humidity and rainfall, cedar and redwood naturally resist the moisture that causes other woods to rot. Composite and PVC are also excellent choices, as they won't absorb moisture or support mold growth.
Hot, Dry Climates In Southwest regions, wood decking can dry out and crack without regular sealing. Composite decking can get quite hot underfoot but won't suffer the same drying and cracking issues.
Building Your 10' x 10' Deck: Breaking It Down
Ron Lach
Now that you've selected your material, let's get into the actual building process. I've designed this as a ground-level or low-elevation deck that sits no more than 30" above ground—perfect for most small backyards and patios.
Materials Shopping List
Structure Materials:
Concrete deck blocks or post anchors (9)
2x8 pressure-treated lumber for rim joists (4 boards at 10' length)
2x8 pressure-treated lumber for interior joists (7 boards at 10' length)
Joist hangers (14)
3" exterior deck screws (5 lbs)
½" galvanized bolts, washers, and nuts (optional, for connecting beams)
Decking Materials:
Decking boards in your chosen material (roughly 110 square feet to account for waste)
Hidden fastener system (if using grooved decking)
2½" deck screws (for face-mounting boards if not using hidden fasteners)
Finishing Materials:
Deck sealer or stain (for wood decking)
Paint brushes or rollers for application
Tools You'll Need
Los Muertos Crew
Measuring tape (25' minimum)
Carpenter's square
Line level and string
Power drill with driver bits
Circular saw or miter saw
Jigsaw (for cutting around obstacles)
Level (2' or longer)
Hammer
Shovel and rake (for ground preparation)
Safety glasses and work gloves
Step-by-Step Weekend Warrior Guide
Baixi Liu
Day 1: Ground Prep and Frame Layout (3-4 hours)
1. Mark your deck perimeter using stakes and string, ensuring corners are square using the 3-4-5 method.
2. Remove any grass or vegetation from the deck area and level the ground as much as possible.
3. Position your concrete deck blocks or post anchors in a 3x3 grid pattern, spaced approximately 5' apart.
4. Use a long level and string to ensure the tops of all blocks/anchors are level with each other.
Day 2: Building the Frame (4-5 hours)
1. Create your outer frame by connecting four 10' rim joists in a square, securing the corners with screws.
2. Place the frame on your support blocks/anchors and verify it's level in all directions.
3. Install your interior joists, spacing them 16" on center using joist hangers.
4. Double-check that the entire frame is level and square before proceeding.
Day 3: Installing Decking (5-6 hours)
1. Start laying decking boards perpendicular to your joists from one edge of the deck.
2. Leave a ⅛" gap between boards to allow for drainage and expansion.
3. Secure each board using your chosen fastening system.
4. Use a chalk line to ensure your boards remain straight as you progress.
5. Cut the final board to fit using a circular saw or jigsaw.
Day 4: Finishing (2-3 hours)
1. Sand any rough edges or splinters (for wood decking).
2. Apply sealer or stain according to manufacturer directions (for wood decking).
3. Allow adequate drying time before placing furniture or heavy items on the deck.
This timeline assumes you're working solo—grab a friend or family member, and you could potentially complete this project in a weekend!
Making the Most of Your 100 Square Feet
Curtis Adams
Now comes the fun part—turning your blank canvas into an outdoor oasis that feels intentional and inviting. With just 100 square feet to work with, every inch needs to pull its weight, but that doesn't mean sacrificing style or comfort.
Layout Option 1: The Intimate Conversation Nook
Perfect for couples or small families who primarily want a space for morning coffee, evening cocktails, or casual conversation.
A small outdoor loveseat (4' wide) positioned against one edge
Two compact armchairs (24" x 24") facing the loveseat
A 24" round coffee table in the center
Potted plants in the corners to soften the edges
String lights overhead for ambient evening lighting
This arrangement leaves pathways clear while creating a natural conversation circle that feels cozy rather than cramped.
Layout Option 2: The Al Fresco Dining Deck
Ideal for those who love outdoor meals or working from home with a view.
A 48" round table in the center (seats 4 comfortably)
Four compact dining chairs around the table
A narrow console table (10" deep) against one edge for serving or display
Lanterns or candle holders on the table for evening ambiance
Hanging plants from pergola posts or shepherd's hooks to add greenery without using floor space
Similar to what I discussed in my article about round tables for patios, the curved edges of a round table make movement around the deck much easier than with a rectangular table of similar capacity.
Layout Option 3: The Multi-Purpose Retreat
For those who want their deck to serve multiple functions throughout the day.
A 3' x 6' bench along one edge that doubles as storage
Two Ottoman seats (18" x 18") that can function as extra seating or side tables
A fold-down wall table mounted to the house that can be raised for dining or projects
Floor cushions that can be brought out for additional casual seating
A rolling bar cart that can be moved as needed
The key to this layout is furniture that can be easily moved, stored, or transformed as your needs change from morning to evening.
Styling Your Deck: The Finishing Touches
Just as with indoor spaces, these final layers are what turn a basic deck into a true extension of your home:
An outdoor rug (8' x 8') to define the space and add comfort underfoot
Weather-resistant throw pillows to add color and comfort to seating
Solar-powered or LED string lights overhead for evening ambiance
Potted plants of varying heights (place larger plants in corners, smaller ones on tables)
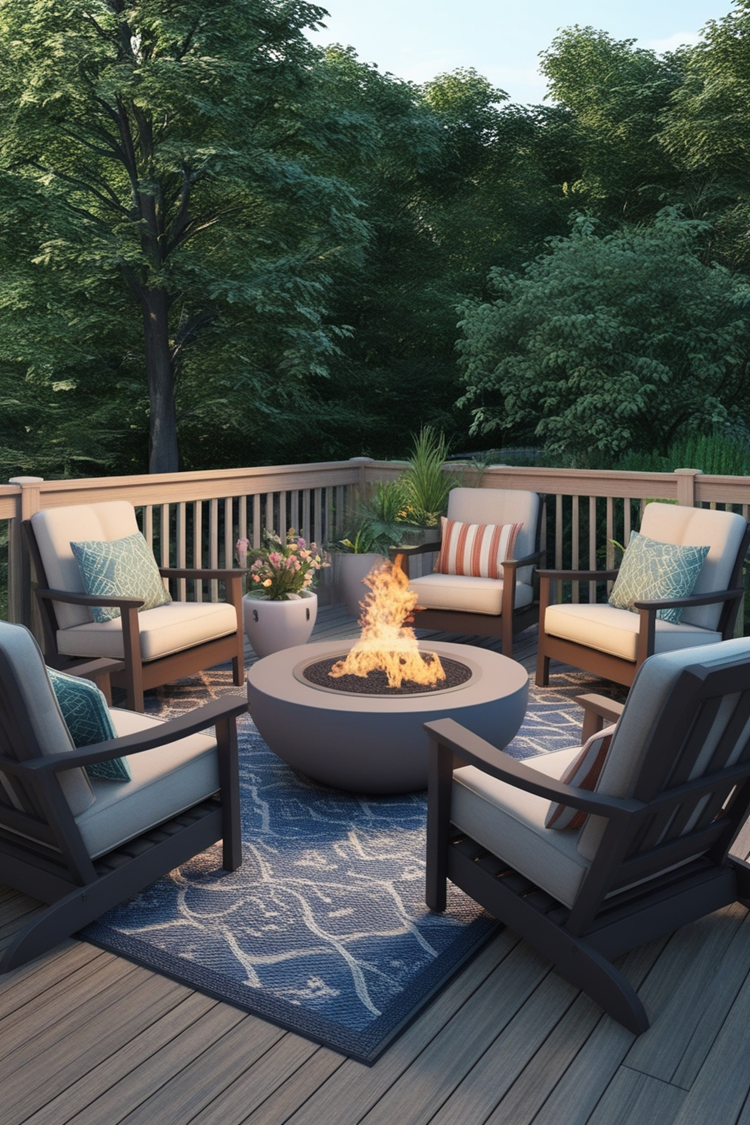
A small fire bowl or tabletop fireplace for extending the season into cooler months
Remember that outdoor spaces need the same design thinking as indoor rooms—consider your color scheme, texture variation, and visual balance just as you would for your living room.
Keeping Your Deck Looking Fresh: Seasonal Maintenance Tips
A small deck requires less maintenance than a large one (another win!), but regular care will ensure your investment looks great for years to come.
Spring Cleaning
Curtis Adams
1. Remove all furniture and accessories
2. Sweep thoroughly to remove debris
3. Wash with appropriate cleaner for your decking material
4. Check for loose boards or hardware and tighten as needed
5. Inspect for any winter damage and address before it worsens
Summer Care
Kaboompics.com
1. Rinse regularly to remove pollen and dust
2. Keep plants in saucers to prevent water staining
3. Reposition furniture occasionally to prevent uneven weathering
4. Apply sunscreen or UV protectant to wood or composite decking as needed
Fall Preparation
Gülşah Aydoğan
1. Clear leaves regularly to prevent staining and moisture buildup
2. Clean and cover or store furniture for winter
3. Trim back any vegetation touching the deck to prevent moisture issues
4. Re-seal wood decking before winter weather hits (every 2-3 years)
Winter Protection
Greta Hoffman
1. Remove snow promptly using a plastic shovel (metal can damage decking)
2. Keep weight loads in mind during heavy snow (remove accumulation before it gets too deep)
3. Avoid using salt or harsh ice melters on any decking material
Your Perfect Outdoor Room Awaits
A 10' x 10' deck might seem modest compared to the expansive outdoor spaces you see in magazines, but don't underestimate the impact these 100 square feet can have on your daily life and home enjoyment. For those of us with limited outdoor space, this "just right" deck size offers the perfect balance of function, affordability, and manageable DIY execution.
Remember that, just like any room in your home, your deck should reflect your personality and serve your specific needs. Whether you're looking for a quiet retreat for morning coffee, a space for intimate gatherings, or an outdoor dining spot for family meals, this versatile addition can be customized to become your favorite "room" in the house—one that just happens to have the sky as its ceiling.
Have you tackled a DIY deck project? I'd love to hear about your experiences in the comments below!
Read Next:
The Best Small Patio Furniture Ideas for a Cozy, Stylish Outdoor Space
Your small patio has more potential than you think. With the right furniture, smart layouts, and layered details, you can turn it into a charming and functional retreat. Discover how to make the most of every square inch—without sacrificing comfort or style.
Michael is Principal designer and blogger at Michael Helwig Interiors in beautiful Buffalo, New York. Since 2011, he’s a space planning expert, offering online interior e-design services for folks living in small homes, or for those with awkward and tricky layouts. He’s a frequent expert contributor to many National media publications and news outlets on topics related to decorating, interior design, diy projects, and more. Michael happily shares his experience to help folks avoid expensive mistakes and decorating disappointments. You can follow him on Pinterest, Instagram and Facebook @interiorsmh.


