For this week’s DIY Sunday, it’s all about watching the clock! No, not like you’re at work on a painfully slow day and all you can think about is 5 o’clock and running like your ass is on fire out the door… This clock watching is a little different. That’s because you can create a totally working clock out of some PVC pipe and a little ingenuity! Let’s get our creative on, shall we? Here’s how to make a simple clock:
As you may know, this DIY Sunday series is kinda new. I love creating simple diy and home decorating projects for my own home and I actually use all my nifty creations myself. I challenged myself last week to make two décor projects out of a clock I found at Walmart. The first creation was a sunburst wall mirror and this is the second half of that challenge.
How To Make A Simple Clock Step #1: Gather The Materials And Take Apart Clock
You can find all the materials for this project in a couple of stores around town: Home Depot or Lowe's and Walmart. My first stop was Walmart where I picked up this wall clock. It was $3.88 before tax, so I thought that was a pretty good investment for the base of two DIY projects. The other materials I purchased at Lowe's. Here’s what you’ll need:
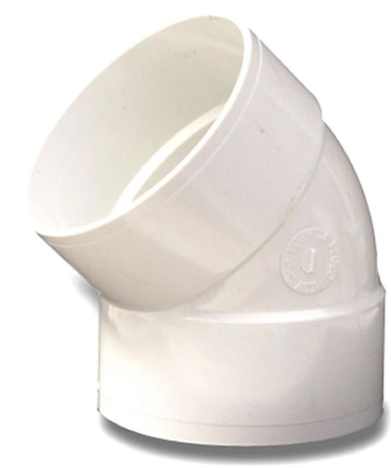
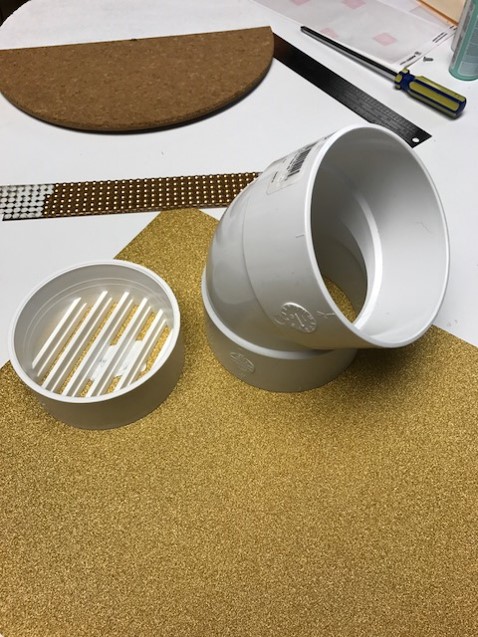
4-in Dia 45-Degree PVC Elbow Fitting
NDS 3.25 x 3.25 x 3-in Dia Round Grate
1 - 8” Plastic Wall Clock
1 Small Foam Core Board or a Scrap Piece of Foam Core
Masking Tape or Painter’s Tape, whatever you have on hand
Some Decorative Paper or Contact Paper or Drawer Liner.
Some Craft Paint (optional)
Pencil or Pen
Scissors
Screw Driver
Ruler
Turn the clock over and remove the back so that you can get to the clock work. Gently remove the hands of the clock and pull out the clock work. Be care not to break or bend the hands because you’ll be using them for the new clock.
How To Make A Simple Clock Step #2: Trace Drain Grid Onto Foam Core and cut it out
After you set aside the clock works, you’ll want to do is to grab the drain grid and trace the outside diameter onto the piece of foam core. This is going to be the support for your clock face. And what you’ll re-mount the clock work to.
To get an accurate center point on your circle, grab your ruler and draw out a 3.25 x 3.25 – inch square on the foam core. Then place the drain grid cover in the center of the square and trace the diameter of the grid. Draw two diagonal lines from each opposite corner so you have an “X” going through the center of the circle. This is your center point.
When you have the shape traced, cut the circle out of the foam core with a pair of scissors. It helps to have a sharp pair of scissors for this step. Also, cut the foam core slowly so you don’t crush the edges too much. If you prefer cutting the circle out with a craft knife do that.
How To Make A Simple Clock Step #3: Trace Drain Grid Onto Decorative Paper
Repeat the last step, trace the diameter of the drain grid on the backside of your decorative paper. By tracing on the backside, you’ll avoid having pencil or pen lines on the front face of your clock. You don’t necessarily have to draw out the 3.25 – inch box, because you already have the exact center measurement on the foam core. Once you have the shape traced out, cut it out and put it aside.
How To Make A Simple Clock Step #4: Poke A Hole In The Center Of The Foam Core Circle
Gently poke a hole in the center of the circle where the lines intersect. This is your exact center. As you can see by my picture, my hole is slightly off. That’s because I re-did my circle the way I described it here, but forgot to take a picture! (Ahh the trials and errors of diy-ing!) I used my scissors to get the hole started and then I switched to poking the rest of the way through with my pencil so that the hole would be round.
Next place two pieces of tape on either side of the foam core. This is what will secure the clock face to the drain grid. Then take your decorative contact paper and secure it to the foam core on top of the two pieces of tape. After that, gently poke a small hole through the decorative paper. Don’t make the hole as big as the first hole, just make it big enough to get the clock work mechanism through.
How To Make A Simple Clock Step #5: Attach the Clock Work Mechanism To The Foam Circle
Flip the foam circle over and poke the clock work mechanism through the center hole so that the small white dial thingy is all the way through… Yes that’s a technical term… I chose to glue my clock housing to the backside for extra security. A few lines of hot glue should do the trick.
Now put a battery in the mechanism and place the whole unit inside of the drain grid with the grid face down. Attach the tape to both sides of the grid. Now gently re-attach the clock hands and set the correct time by moving the dial on the back of the mechanism.
How To Make A Simple Clock Step #6: Put It All Together!
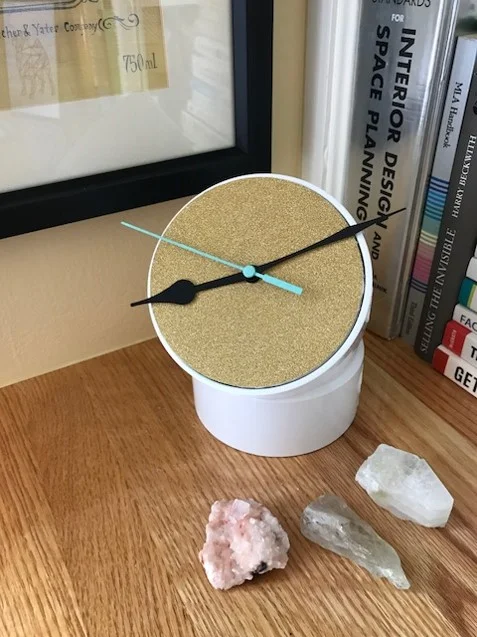
When you have the clock hands attached and set to the correct time, Place the drain grid into the top of the PVC elbow. There is a slight difference in the sizes of the elbow and the grid so the gird should fit nicely into the elbow. That’s it! You have a functional, cool and kind of industrial looking clock.
I liked the minimal look so I decided not to add numbers to my clock face. I did paint the second hand with some craft paint to give it a bit of color and flare. If you wanted to embellish it more, you cold paint the elbow and the hands a different color. For me, I’m really feeling the white and gold trend that’s happening now so that’s what I went with.
That’s it! Two diy projects from one 8” clock. If you’re enjoying DIY Sunday, let me know, like and share with your friends. I love making fun and functional home décor projects and sharing them here!
Let’s keep in touch. Subscribe to my Newsletter so I can send you more amazing and FREE inspiration to get your makeovers really going. Each month I’ll send you my newsletter packed with all kinds of decorating advice and simple diy’s that I only share with my subscribers. Click here to subscribe.
Michael is Principal designer and blogger at Michael Helwig Interiors in beautiful Buffalo, New York. Since 2011, he’s a space planning expert, offering online interior e-design services for folks living in small homes, or for those with awkward and tricky layouts. He’s a frequent expert contributor to many National media publications and news outlets on topics related to decorating, interior design, diy projects, and more. Michael happily shares his experience to help folks avoid expensive mistakes and decorating disappointments. You can follow him on Pinterest, Instagram and Facebook @interiorsmh.


