How to Draw & Measure a Room for e-Design
Necessary Tools
Important
For Paint Color e design I still need full room measurements to advise you on the amount of paint you will need for your project.
I need ONLY the wall measurements for the wall(s) I will be designing for Wall Elevation e design.
Providing me with accurate room measurements is important because without them, I cannot recommend the placement of any existing or new furniture in your home.
Step 1: Draw Room Shape
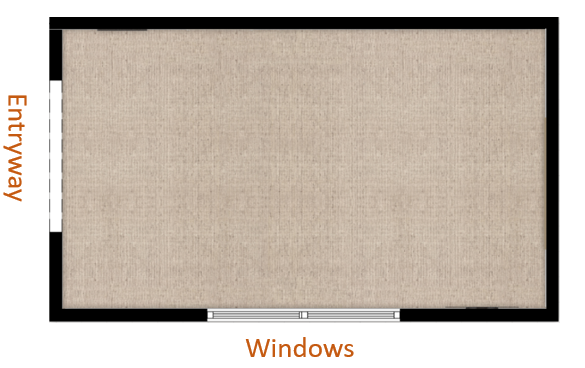
Draw Room as if looking at it from above.
A hand drawn sketch on copy paper is fine.
Try to avoid sketching the room on lined paper because it’s hard to read.
The idea is to get the shape of the room down including angled walls, bump outs, recesses or any other portions of the wall that can not be moved.
Label doors, entryway, architectural features, windows, etc. in the margin
Step 2: Measure Room Length & Width
Measure the overall length and width of the room in inches to the nearest whole inch.
Step 3: Measure Each Wall Segment
Measure each wall segment including doorways, windows and architectural details like fireplace, built-in cabinetry, alcoves, etc.
Step 4: Compare Overall and Individual Wall Segments for Accuracy
Compare the total measurements of overall length and width to each segment.
The total of the individual measurements should be close to the overall measurements.
There will likely be a slight difference, but it should not be off by several inches.
Step 5: Record the Height of Ceiling, doors and windows
Measure and record the height of doors, doorways, entrances.
Measure and record the height of windows: include the measurement from the floor to the bottom of the sill, from the bottom sill to the top and from the top of sill to the ceiling.
Write the dimensions in the margin.
Measure the height and width of the exterior door that you’ll use to bring furniture into the house.
Include the thickness of the door that sticks out into the jab opening as it will diminish the width dimension.
If you have a wall directly opposite the exterior door, measure the distance so you know how much space you have to turn long pieces of furniture.
Depending on the distance, you may have to stand pieces like sofa on their side to angled it into the room.
Other obstructions like staircases will also need to be measured.
Again, measure the distance between the exterior door and the foot of the stairs if directly across form it.
Also, measure the distance between the top of the stirs and the ceiling inside an enclosed staircase as this will be very important for getting large furniture up stairs.
If you live in a building with an elevator, make sure you know the height, width and depth of it so you know that your furniture will fit inside.
Step 6: Record the Height, Width and Depth of Permanent Architectural Features
Here we have a fireplace. It is labeled in the margin and the dimensions are recorded on the sketch.
It’s fine to record the height of the feature with an asterisk (*) in the margin.
If your wall has niches or bump-in’s, measure height, width and depth of the space.
These are often great places to put credenzas, etageres or floor cabinets.
If you have angled walls where the ceiling is higher on one end than the other, make sure you know the measurements of that space because it will affect the placement of taller pieces.
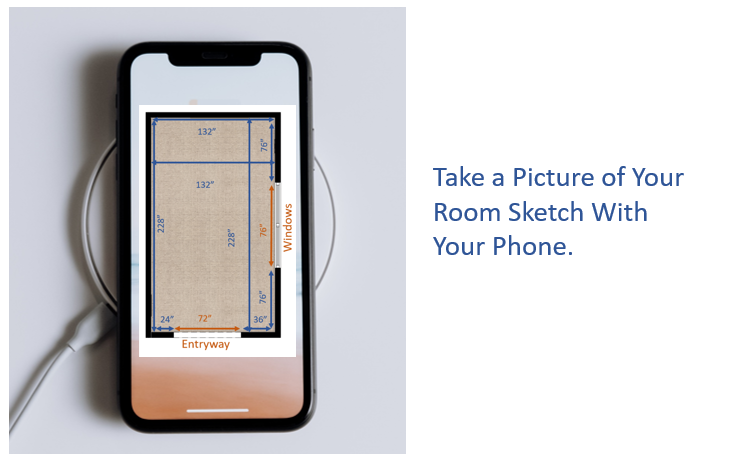
Step 7: Take a Picture of Your Room Sketch
Snap a picture of your room sketch with your phone and then go on to Photographing your room as shown below.
How to Photograph a Room for e-Design
Step 1: Photograph Each Wall Straight On
The blue dot represents where you should stand and the orange arrow represents the direction the picture should be taken.
Take a picture of each wall from the center of the opposite wall.
(The room does not need to be empty.)
I just need to see where objects like doors, windows and architectural features are in relation to the room sketch you provide.
This is helpful to orientate me to your room since I will not be there in person.
Step 2: Photograph Each Wall Diagonally
Stand in each corner of the room and take a picture of the opposite corner.
This ensures that I get a 360 degree representation of the room and I am able to see where every architectural feature is.
Step 3: Measure and Photograph Any Furniture That Stays
If you’re keeping any furniture or items that will occupy floor or wall space, measure the items and record the measurements on your sketch.
Take a photo of the item straight on and (for furniture) off to the side so I can see the depth of the piece.
Send Your Sketch and Pictures to Me
From Your Phone, Computer or Tablet
Upload all your pictures to me: room sketch, room pictures and furniture that’s staying. You can upload multiple images in Add Your Files.
Supported files: .jpg, .jpeg, .png, .pdf


