

Are you looking to liven up your room and give it a sleek, modern makeover at the same time? Let’s talk about downlights.
Downlights are also called recessed lights, and their market size was valued at USD$ 6162.41 million in 2022.
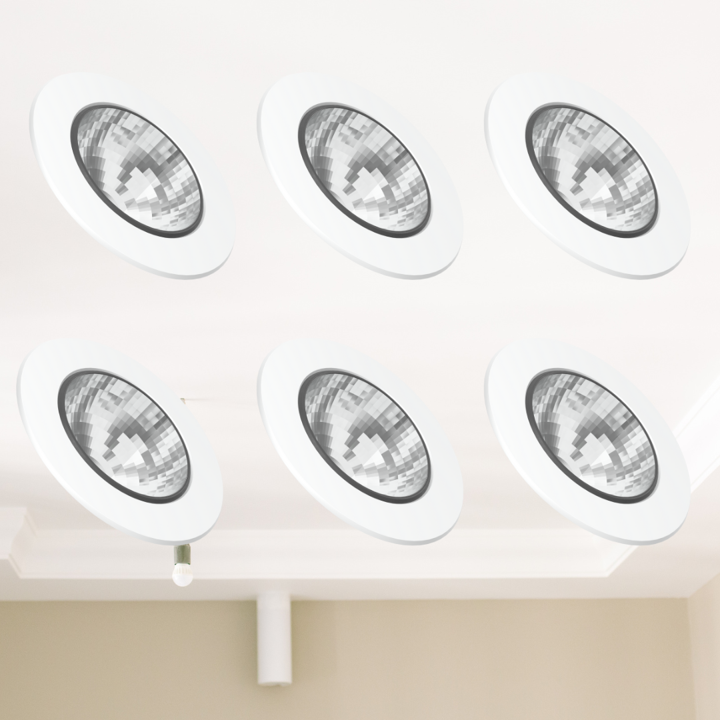
They're light fixtures that get installed into hollow openings in the ceiling. Because the lights are positioned flush with the ceiling, they project illumination downward into the space below. (1)
The benefits of installing downlights
First off, their recessed design gives you more overhead space compared to surface-mounted fixtures. Plus, downlights offer a sleek, minimalist look that won't overwhelm a room like chandeliers or lamps might. They're also great for focusing light exactly where you want it, whether that’s illuminating your kitchen counter for tasks or showcasing artwork on your walls.
Another big advantage of downlights is how versatile they are.
If you like setting the mood, consider dimmable models.
And for those interested in energy efficiency and longevity, LED downlights are a popular choice—they last a long time and use less energy.
Installing downlights
But how do you install downlights like a pro? Read on for a step-by-step guide.
Step 1: Plan the layout
The very first step is to plan out your downlight layout. This will ensure your new lighting looks fabulous and functions best.
Determine the number of downlights needed
It should be based on the room's square footage and purpose.
As a general guideline, you'll want one downlight for every four to six square feet of living space.
However, this can vary based on your lighting needs. For example, a home office may require more downlights compared to a bedroom of the same size. (2)
Measure the room and decide on the placement
Once you have the number of lights needed, grab a tape measure and measure your room.

Meruyert Gonullu
Tip: Note the locations of any obstructions like beams, cabinets, or architectural details. They could impact downlight placement.
Consider the purpose of the space
In living rooms or bedrooms, downlights work best as ambient lighting complemented by task or accent lighting.

Mark McCammon
In kitchens, place downlights over workspaces for meal prep.
For bathrooms, flank vanity mirrors with downlights to minimize shadows.
Walk-in closets, use an even grid of downlights to light up everything.
Step 2: Cut holes for the downlights
Make sure that the power supply is safely shut off. Then, it's time to install your new recessed lighting.
Mark the locations for the downlight holes
Carefully mark where each downlight hole needs to be cut into the ceiling.
Use a pencil or chalk line to lightly outline the correct hole diameter based on your specific downlight housing size.
Most housing requires a six-inch or five-inch hole. But just double-check the manufacturer's specs. (3)
Cut the holes
You'll need either a hole saw, or a drywall saw to cut through the drywall or ceiling material. Just make sure that it has a compatible hole saw attachment.
Clear debris
This process can get a bit messy and it’s a good idea to clean as you go.
When all the holes are cut, use a vacuum, broom, and dustpan to clear away any drywall debris. Clear any insulation or wood shavings left behind too.
Then, run a utility knife or drywall saw around the raw edge of each hole as needed to smooth it out.
Step 3: Install the downlight housing
With the holes cut, it's time to get those downlight housings securely mounted into the ceiling openings. It's simple enough, but it's crucial to follow the manufacturer's instructions closely.
Insert the downlight housing into the holes
Carefully insert the housing up through each hole in the ceiling. The trim ring or housing flange should come to rest flush against the ceiling's surface.
Secure the housing
Once the housing is in place, it's time to secure them in place per the included instructions.
Many downlights use spring-loaded clips that can be tightened to grip onto the ceiling material from inside the housing.
Others may have mounting brackets that get screwed or nailed into the ceiling joists above.
Connect the wiring
On some models, you may have the option to connect wiring at this stage by routing cables through knock-out plates in the housing sides.

Static Electrics
Check your product details, and if applicable, go ahead and link up the hot, neutral, and ground wires according to local electrical codes.
Step 4: install the trim and bulb
With the housing securely mounted and wiring complete, your downlights are nearly ready to use.
Insert the trim
Locate the trim rings, baffles, or decorative covers that come with your downlight kit.
These components slip into the outer housing to provide a polished look while controlling light direction.
Once found, gently insert each trim piece into the housing.
Apply upward pressure until it locks into place per the manufacturer's instructions.
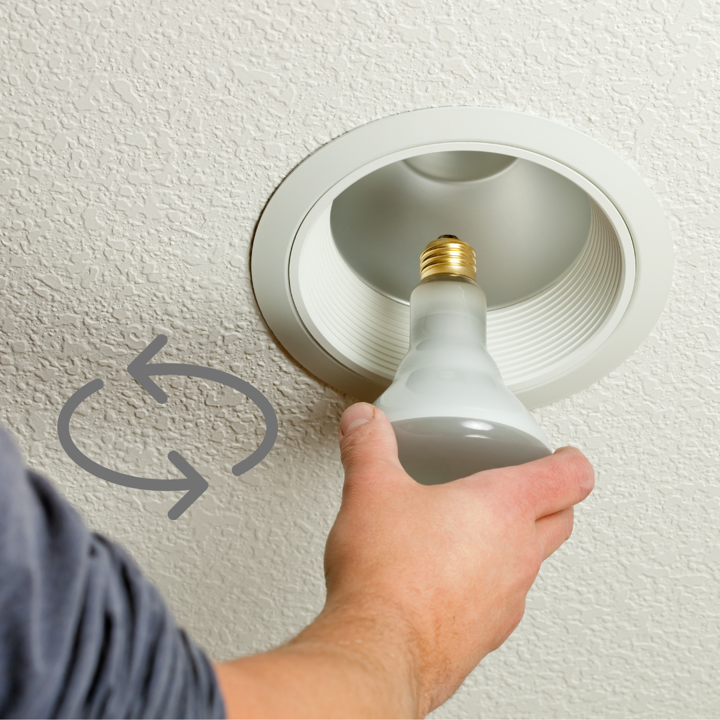
Install the appropriate bulb
With trims installed, you're ready for the bulbs!
Refer to your downlight's listed specifications to determine the appropriate bulb type, wattage, beam angle, etc.
Tip: LED bulbs are an excellent energy-efficient choice. Just be sure any bulbs you use are rated for recessed lighting enclosures to avoid overheating risks.
Carefully twist the bulbs into the light sockets until they lock in place. Remember, twist them gently into the socket. No need for excessive force.
Make sure the trim is firmly in place and the bulb is correctly positioned.
Before considering this step complete, inspect each downlight from below.
The trim should have a seamless, polished look with no gaps.
Bulbs should not be crooked, and all the light sources should illuminate when tested.
Tip: Make any needed adjustments now while you have easy access.
Step 5: Turn on the power supply
With the lighting housings installed, wired, and trimmed out, it's finally time for the big reveal! But before basking in your new downlights' warm glow, you'll need to restore the electrical power.
Turn on the power supply
Flip the light switch to apply power to your new lighting. If the installation went smoothly, your downlights should instantly illuminate!
Test the downlights
Do a full walk-through, examining each light closely to verify it's operating correctly with no flickering or buzzing.

Static Electrics
If any downlights aren't receiving power, shut off the circuit again and inspect the lightbulb, trim, wiring connections, and breaker.
Make needed repairs before attempting to re-energize.
The final touches
Assuming all your hard work paid off, congratulations! You've just upgraded a space with stylish, energy-efficient lighting.
With basic upkeep, your downlights will provide reliable, energy-efficient lighting for years and even add value to your home. Nice work on executing this modern lighting upgrade!
References:
1. "Downlights Market Size Analysis: Insights and Forecast to 2030", Source: https://www.globenewswire.com/news-release/2023/10/25/2766222/0/en/Downlights-Market-Size-Analysis-Insights-and-Forecast-to-2030.html
2. "How Many Can Lights Per Room? Your Guide to Recessed Lighting for Any Space", Source: https://www.angi.com/articles/how-many-can-lights-per-room.htm
3. "How Much Does It Cost to Install Recessed Lighting In 2024?", Source: https://www.forbes.com/home-improvement/electrical/cost-to-install-recessed-lighting/
Read Next:

Create Your Cozy Light Academia Bedroom: Timeless Charm For Small Spaces
Ready to transform your small bedroom into a cozy, vintage, light academia style dreamland? This one’s all about giving your bedroom a vintage style makeover that will have your bff’s praising your DIY skills and décor choices! Jump into a world where learning meets timeless charm—perfect for crafting a space that reflects your scholarly passions and personal style.
Join the Fun!
If you enjoyed this post and you want to keep seeing my weekly blog, the best way to do that is to subscribe.
You can subscribe by downloading my 11 Secrets Only Designers Know to Make Your Space Rock. If you’re curious about how decorators and designers make a home look magazine ready, you’ll love taking a gander at these 11 secrets. You’ll learn how to style your room from the floor up and it will work for ANY space you have.
I write about small space design and decorating, sustainable furniture options, positive self care and a variety of do-it-yourself home décor.
I’d love to connect with you!
“Michael Helwig was top-notch, very professional and responsive to my needs. He allowed me time to explore ideas and try out a variety of combinations until we found the perfect fit. Michael provided detailed information and offered beautiful ideas to make my dream living room become a reality. The furniture he sourced has totally transformed my living room space. Everyone that has seen my new living room has one word, WOW! A special thank you to Michael for a wonderful experience”
“Michael was very knowledgeable and guided us, with great patience and good humor, through the process of designing our dining room and helping us find the perfect sleeper sofa. He offered really helpful advice when we asked questions - which was often - but at no time did we ever feel pushed. He helped me when I felt like I couldn’t make one more decision. When my new furniture finally arrived I realized everything down to the pillows was perfect. I couldn’t be happier!”
The opinions and views expressed in any guest blog post do not necessarily reflect those of Michael Helwig Interiors or its Principal, Michael Helwig. Michael Helwig Interiors, and Michael Helwig, do not have any affiliations with any products or services mentioned in the article or linked to therein. Guest Authors may have affiliations to products mentioned or linked to in their articles or bios.
By day, Watt Robertson keeps the lights on, working as a licensed electrician for over 15 years. By night, he tackles a different kind of current, sharing his knowledge and untangling electrical mysteries on his blog. When he's not troubleshooting or writing, Watt finds Zen in the meticulous art of Japanese woodblock carving.


