Here is where diy Sunday begins! I’m excited to bring this series of simple diy’s to Michael Helwig Interiors. For this first project I decided to try my hand at a super simple sunburst mirror and desk clock project. That’s right! It’s two simple diy projects made out of one inexpensive wall clock.
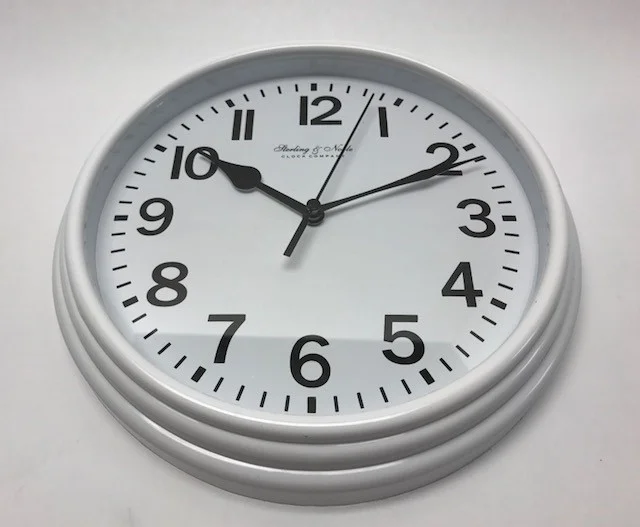
I’ve been seeing these challenges up on Youtube and the web everywhere. You might find them as Dollar store diy’s or a thrift store find that is creatively crafted into something magnificent for the home. My approach was to find one item and make two things out of it. So I went to my local Walmart and spent $4.22 on a plain white plastic wall clock. My intention was to only create only a sunburst mirror but the thrifty diy dude that lives in my head said, “hold up! We can make a mirror and a funky clock out of this one clock!” And so I began…
Here is what you will need for this project:
1 - 8” plastic wall clock
1 - 6” mirror
A Phillips screwdriver
A compass with pencil
Colorful contact paper of your choice
Scissors
Hot glue gun and glue sticks
Spray paint of your choice
3 packages of 1/8” x 12” wood dowels
Masking tape or painters tape
Wood beads
Miter saw and miter box
Styrofoam
Some decorative trim for around the mirror
Floral wire
Step 1 Easy diy Sunburst Mirror: Remove Back
Flip the clock over and remove the small screws that hold it together. Save the screws and the small black discs that hold the clock in the packaging. They will come in handy later on when you re-assemble the housing.
Step 2 Easy diy Sunburst Mirror: Remove Clock Hands
Turn the clock back over and gently pull off the hands. They should pop right off and make sure you don’t break them. They will be easy to bend so try to keep them as straight as possible. Put them aside because you’ll be using them for the next diy! So fun!
Step 3 Easy diy Sunburst Mirror: Measure Radius
Next place the needle side of a compass in the center of the clock where the hands were and extend the pencil end to the inside edge of the clock face. This is your measurement for the diameter of the mirror face.
Step 4 Easy diy Sunburst Mirror: Draw the Radius
Now transfer that measurement onto the back of your colorful contact paper. Just place the needle anywhere on the back of the contact paper and spin the pencil side around to create the circle. This is just like art class in Jr. High, remember? I think my compass may just be from Jr. High, it’s well loved and used often!
Step 5 Easy diy Sunburst Mirror: Cut Out Circle
Time to cut out your circle. Then put the circle aside for a few minutes.
Step 6 Easy diy Sunburst Mirror: Hot Glue Wood Scraps To Clock Face
In order for your paper to lay flat on the face of the clock you’ll want to build up some support that is the same depth as the mirror clock face. Mine was about ¼” so I just used some scrap pieces of wood from an old project. I hot glued them at 12, 3, 6 and 9 o’clock.
Step 7 Easy diy Sunburst Mirror: Attach Decorative Paper
I then peeled back the contact paper backing and stuck it on the outside edge of the clock face and I made sure to press down on the scrap wood underneath to make it secure. I added a tiny bit of hot glue to the edge just to really make sure it was going to stay in place. This is optional but I found that it made my paper lay super flat which is what you want.
Step 8 Easy diy Sunburst Mirror: Paint Frame
Time to head outside to a well ventilated area and spray the back or inside of your clock housing. This is the outside cover that you removed in step one. Give it a good coat of spray paint and let it dry for about 15 minutes. Dry times will vary. I sprayed mine on a very warm 80 degree day so it dried super fast. After the inside dries, flip it over and spray the outside.
Step 9 Easy diy Sunburst Mirror: Prepare Dowels
While your outside housing is drying, go back in and get your dowels counted out and taped together. The way I designed my mirror was to have a bunch of dowels of different lengths bursting out from the center of the mirror.
Here’s my formula:
8 – 12” dowels
8 – 10” dowels
15 – 8” dowells
I found it easiest to divide them up, level them out, and tape them together and so I could measure the lengths that I need to cut all at the same time.
Step 10 Easy diy Sunburst Mirror: Cut Dowels
For each ground of dowels, make a small hash mark at each measurement and gently cut them on your miter box. If you don’t want to use the miter box you can easily cut the small dowels with a strong pair of scissors but I found using the saw and box is super quick and easy. Be careful not to cut too fast because you could splinter the dowels.
Step 11 Easy diy Sunburst Mirror: Attach Wood Beads
I wanted a little extra detail on my bursts so I went for gluing some wood beads I had in my craft drawer onto the dowels. I started with the longest dowels first and added beads at the tips and then I measured down about 3” for the second bead. I used a small drop of hot glue to secure the beads to the dowels.
Step 12 Easy diy Sunburst Mirror: Stick Dowels In Styrofoam
I repeated this process for the rest of the dowels. For the shorter lengths I just glued the beads to the ends of the dowels. I had this Styrofoam wreath form in my craft drawer. You’ll need something like this or a piece of packing Styrofoam to secure the dowels.
Step 13 Easy diy Sunburst Mirror: Paint Dowels
Back outside, coat the dowels with spray paint making sure to cover all surfaces. I used a couple of coats because I really wanted to make sure each was covered completely. It may be a bit tricky to get the undersides of the beads but having them all coated will make for a very pretty final product.
Step 14 Easy diy Sunburst Mirror: Reattach Frame
Grab your housing and head back inside to reattach the housing to the clock by screwing the screws back into their holes like this.
Step 15 Easy diy Sunburst Mirror: Glue Support Down
I had this Styrofoam ball in my craft drawer and I cut it down with scissors so it was the same height as my clock housing. I wanted something round to attach the dowels to on the back of the clock and this was the perfect thing! After I cut it down I hot glued it in the middle.
Step 16 Easy diy Sunburst Mirror: Attach Mirror, Embellish
Next, turn the clock back over and glue the 6” mirror in the center of the face. To add embellishment, I decided to blue these little round dots around the mirror. In hindsight, I could have used some decorative rope or string to add a bit of detail but I decided to glue each of these beads down one by one. I really like how the final product turned out but it was definitely more time consuming.
Step 17 Easy diy Sunburst Mirror: Attach Longest Dowels
Flip it back over and start adding on your longest dowels. I placed an old towel down so I wouldn’t scratch the paint on the front of the mirror when I moved it around. Glue each one directly across from one another. I made a cross first by placing each dowels North, West, South and East and them I added the next four on the diagonal across form one another. I made sure that I spaced each one so that they were the same distance form each other. I just eyeballed this placement and that proved to be a pretty good option. I glued each dowel in the center on the Styrofoam an on the back outside edge for a little extra security. Be careful not to get glue on the front of your housing because it will be visible.
Step 18 Easy diy Sunburst Mirror: Finish Attaching Dowels
Finish gluing all the dowels down by alternating the different sizes in between the longer ones. Fill in the remaining lengths to finish up the bursts all around the mirror. Just keep alternating the lengths by filling in the spaces. It won’t look too pretty form the back but the front will be awesome!
Step 19 Easy diy Sunburst Mirror: Secure Hanging Wire
Remember that round disc that held the clock in the cardboard box from the store. I used that to secure a small piece of floral wire to the back. This will be how I hang the mirror because I covered over the old hole that allowed the clock to hang on the wall with dowels. As you can see, I make double sure that everything is secured with hot glue. It’s not pretty but it does the trick and no one will see the back because it’s hanging on the wall.
Step 20 Easy diy Sunburst Mirror: Hang It Up and Enjoy!
The last thing to do is find the perfect spot and hang it up to enjoy!
There you have it. An inexpensive $4.00 clock transformed into a stylish and beautiful sunburst wall clock. If you’re wondering how much this project cost it was much less expensive then trying to find a decorative mirror from the store. With everything totaled up, including tax and store discounts I spent $12.73. That’s pretty good. Don’t forget, I will show you the second half of this challenge next week where I design a desk clock with items that I have already in my home, The total for the second half of this project, $0.00!! Check back next week to see how it turned out.
If you’ve found this diy inspiring please share it with your friends! I’d also love for you to subscribe to my newsletter. You can do that right here. I’ll keep in touch each month with tons of great decorating advice, simple diy home decorating projects and lot’s of other super helpful stuff that I only share with my subscribers.
Michael is Principal designer and blogger at Michael Helwig Interiors in beautiful Buffalo, New York. Since 2011, he’s a space planning expert, offering online interior e-design services for folks living in small homes, or for those with awkward and tricky layouts. He’s a frequent expert contributor to many National media publications and news outlets on topics related to decorating, interior design, diy projects, and more. Michael happily shares his experience to help folks avoid expensive mistakes and decorating disappointments. You can follow him on Pinterest, Instagram and Facebook @interiorsmh.